Ultimate Guide to Photo Editing with Adobe Photoshop
Adobe Photoshop is a powerful photo editing application, but you do not need to learn every panel and tool before you can produce better images. A reliable workflow matters more than knowing every feature. Start with global corrections, make selective edits with layers and masks, remove distractions, then sharpen and export for the final use.
This guide covers the Photoshop photo editing techniques that are useful for everyday photography, including RAW processing, colour correction, retouching, non-destructive editing, and exporting images for web or print.
Set Up a Practical Photoshop Workspace
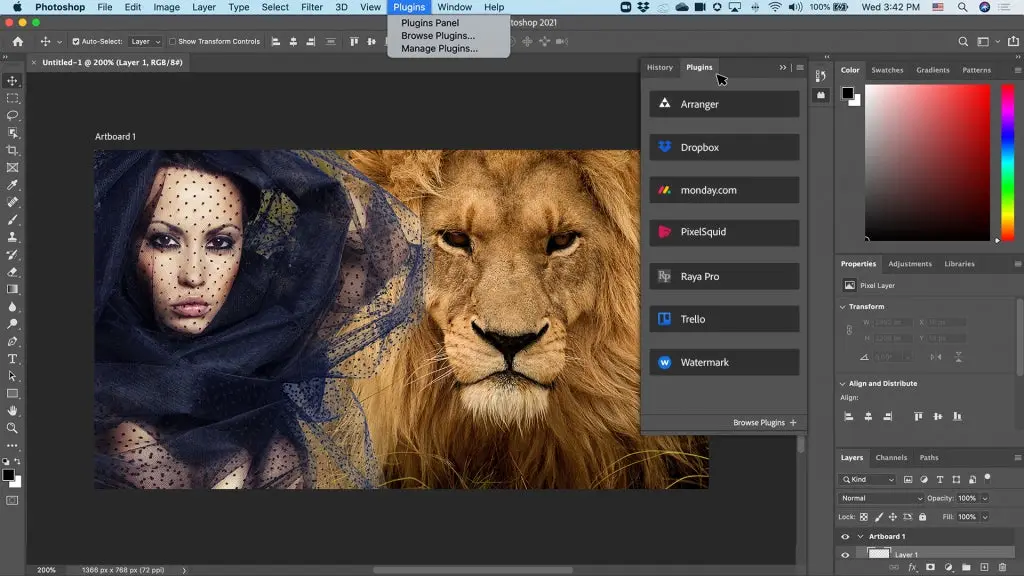
A tidy workspace makes editing easier. Photoshop includes workspace presets that arrange its panels for different tasks. The Photography workspace is a sensible starting point because it keeps the Layers, Adjustments, Properties, Histogram, and related panels close at hand.
Choose it from Window > Workspace > Photography. You can then move panels into an arrangement that suits your screen and save the layout as a custom workspace.
- Keep the Layers panel visible at all times. It is the centre of a non-destructive workflow.
- Open Window > Adjustments for quick access to Curves, Levels, Hue/Saturation, and other adjustment layers.
- Enable graphics processor support in Preferences > Performance if your computer supports it. This can improve responsiveness in some tools and previews.
- Set a sensible number of History States in Preferences, but do not treat history as a backup system. Save versions of important work instead.
Colour settings deserve care. For images intended for websites, social platforms, and general screen viewing, sRGB is usually the safest output colour space. For printing, follow the requirements of the printer or print lab. Do not convert every file to a larger colour space automatically; preserving the embedded profile and making an intentional conversion for final output is often the better approach.
Start With RAW Files in Adobe Camera Raw
When you open a supported RAW file in Photoshop, it normally opens first in Adobe Camera Raw. This is where you should make broad corrections before detailed work in Photoshop itself. RAW files retain more editing flexibility than JPEGs, especially in bright highlights and dark shadows.
Begin with the image as a whole rather than chasing small imperfections immediately. A useful order is white balance, exposure, highlight and shadow recovery, tonal contrast, colour, cropping, and local adjustments.
Key Adobe Camera Raw Controls
- White Balance: Corrects an image that looks too warm, too cool, or tinted by mixed lighting. Use the white balance picker on a neutral area when one is available.
- Exposure: Adjusts the overall brightness. Avoid pushing it so far that important highlights or shadows lose detail.
- Highlights and Shadows: Help manage bright skies, windows, dark clothing, and shaded areas without changing the entire image equally.
- Whites and Blacks: Set the bright and dark points of the photograph. Small adjustments can give an image more depth.
- Texture and Clarity: Add local contrast, but use restraint on faces. Too much can make skin, skies, and edges look harsh.
- Vibrance and Saturation: Vibrance generally affects muted colours more gently, while Saturation raises colour intensity across the image.
Use the Crop tool early if composition needs attention. Straightening a horizon, removing empty edges, or choosing a stronger framing can improve a photograph more than any colour effect.
When the RAW adjustments are ready, open the image in Photoshop. If you want to retain the ability to revisit Adobe Camera Raw settings later, open the file as a Smart Object. The exact button label can vary by Photoshop version, but the option is available from the Open control in Camera Raw.
Edit Non-Destructively With Layers and Masks
Non-destructive editing means preserving the original pixels as much as possible. It gives you room to change your mind, reduce an effect, or correct a mistake without starting over.
Use Adjustment Layers Instead of Direct Adjustments
Rather than applying changes through Image > Adjustments, add an adjustment layer from the Layers panel or Adjustments panel. Adjustment layers remain editable and include a built-in mask.
The most useful adjustment layers for photo editing include:
- Curves: Fine control over brightness, contrast, and individual colour channels.
- Levels: A straightforward way to set black, midtone, and white values.
- Hue/Saturation: Useful for changing a specific colour range or reducing an overly intense colour.
- Color Balance: Helpful for creative colour grading or correcting colour casts in shadows, midtones, and highlights.
- Selective Color: Offers precise control when adjusting colours in more developed edits.
Control Edits With Layer Masks
A layer mask lets you limit an adjustment to part of an image. On a mask, white reveals the layer, black hides it, and grey creates partial visibility. For example, you can darken a bright sky with a Curves adjustment layer while masking the foreground so it remains unchanged.
Use a soft brush with low opacity for gradual transitions. Press D to reset the foreground and background colours to black and white, and press X to switch between them while painting on a mask.
Use Smart Objects for Filters and Resizing
Convert a layer to a Smart Object before applying filters or performing substantial transformations. Choose Layer > Smart Objects > Convert to Smart Object. Filters added afterward become Smart Filters, which can be reopened, hidden, masked, or adjusted later.
This is especially helpful for blur effects, noise reduction, sharpening, and resizing a placed image multiple times. Keep in mind that Smart Objects can increase file size, so use them where their flexibility is valuable.
Essential Photoshop Photo Editing Techniques
Improve Exposure and Contrast With Curves
Curves is one of the most capable tools in Photoshop. A gentle S-shaped curve can add contrast by lifting brighter tones slightly and lowering darker tones slightly. Keep the adjustment subtle. Strong contrast may look dramatic at first but can hide shadow detail and make skin appear rough.
Curves also works by colour channel. If shadows look too blue, for example, use the Blue channel and make a small correction in the darker portion of the curve. Make small moves and compare the result by toggling the adjustment layer on and off.
Correct Colour Casts and Oversaturated Colours
Indoor lighting, reflections, and mixed light sources can create unwanted colour casts. If Adobe Camera Raw has not solved the issue, use a Color Balance or Curves adjustment layer in Photoshop.
For a specific colour problem, use Hue/Saturation. Select a colour range from its menu, then adjust Hue, Saturation, or Lightness. The targeted adjustment controls can help refine the affected range. This works well for reducing an overly cyan sky, calming a vivid green background, or correcting a distracting coloured object.
Remove Dust, Blemishes, and Distractions
Create a new empty layer above the image before retouching. Set the healing or cloning tool to sample current and below layers. This keeps the original photo untouched.
- Spot Healing Brush: Best for small sensor spots, temporary blemishes, and tiny marks on simple backgrounds.
- Healing Brush: Lets you choose the source area, then blends texture and tone into the destination.
- Clone Stamp: Copies pixels directly from a sampled area. It is useful near edges, patterns, and details where healing produces smudges.
- Content-Aware Fill: Can remove larger objects when there is enough believable surrounding detail to fill the space.
Zoom in while working, but regularly zoom back out. A retouch that looks perfect at high magnification may be unnecessary or obvious at normal viewing size.
Retouch Portraits Without Losing Natural Texture
Good portrait retouching usually means reducing distractions, not removing every line, pore, or variation in skin tone. Keep the person recognisable and avoid edits that make skin look blurred or reshaped beyond reality.
Clean Up Temporary Blemishes
Use the Spot Healing Brush or Healing Brush on a separate layer to remove temporary blemishes, stray hairs, lint, or small distractions. Be cautious with permanent features such as freckles, scars, and moles. Whether to remove them is a creative and personal decision, not an automatic step.
Use Dodge and Burn for Shape and Balance
Dodge and burn can even out patchy light while retaining skin texture. Create a new layer, fill it with 50 percent grey, and set its blend mode to Soft Light or Overlay. Paint softly with white to brighten and black to darken. Work at a low brush opacity and build the effect gradually.
This technique can reduce the appearance of under-eye shadows, soften uneven tonal patches, and guide attention toward the eyes without applying broad blur to the face.
Use Liquify Sparingly
The Liquify filter can adjust clothing, hair, or small distortions caused by lens position and pose. It can also be overused very quickly. Make minor corrections, protect nearby areas with the Freeze Mask tool when needed, and compare with the original often.
Sharpen at the End of the Workflow
Sharpening should usually happen after resizing because the right amount depends on the final output size. An image prepared for a small web display needs different sharpening from a large print.
Convert the image layer to a Smart Object if you want editable sharpening, then try Filter > Sharpen > Smart Sharpen or Unsharp Mask. Judge the result at 100 percent view, but also check it at the size people will actually see.
Watch for halos along high-contrast edges, crunchy textures, and amplified noise. In portraits, sharpening is often best limited to the eyes, eyelashes, hair, clothing details, and jewellery with a filter mask.
Save, Export, and Protect Your Work
Save an editable master file before producing web or print versions. Use PSD for most layered Photoshop files. Use PSB only when a document exceeds PSD format limits or Photoshop requires the larger format.
- Save the layered master file with a clear name, such as project name, subject, and version number.
- Create a duplicate or export a separate file for delivery. Do not flatten or overwrite the master unnecessarily.
- For web use, export from File > Export > Export As. JPEG is widely compatible, while PNG is useful when transparency is needed. WebP may be appropriate where the destination supports it.
- Resize to the dimensions required by the website or platform. Large files slow page loading without improving the visible result on a small display.
- Convert or export to sRGB for general web use and embed the colour profile where available.
- For print, keep full resolution unless the print provider specifies otherwise. Ask the print lab whether it wants JPEG, TIFF, a particular colour profile, or a particular pixel dimension.
Build a Faster Editing Workflow
Speed comes from a repeatable process. Use the same broad order for each shoot, then adapt it to the image rather than applying a heavy preset to everything.
- Learn the shortcuts you use most. B selects Brush, V selects Move, and Ctrl or Command + J duplicates a layer.
- Name important layers, especially when an image contains several adjustment layers and retouching layers.
- Use Actions for repeated tasks such as resizing, adding a border, or preparing files for a consistent delivery format.
- Use File > Automate > Batch when an Action needs to run across a folder of files. Test it on copies first.
- Save versioned files before major retouching or creative changes so you can return to an earlier direction.
Photoshop photo editing becomes much less intimidating when you focus on a few dependable tools: Adobe Camera Raw, adjustment layers, masks, healing tools, and careful export settings. Master those first. They will handle the majority of photographs, and they provide a strong foundation for more advanced work later.