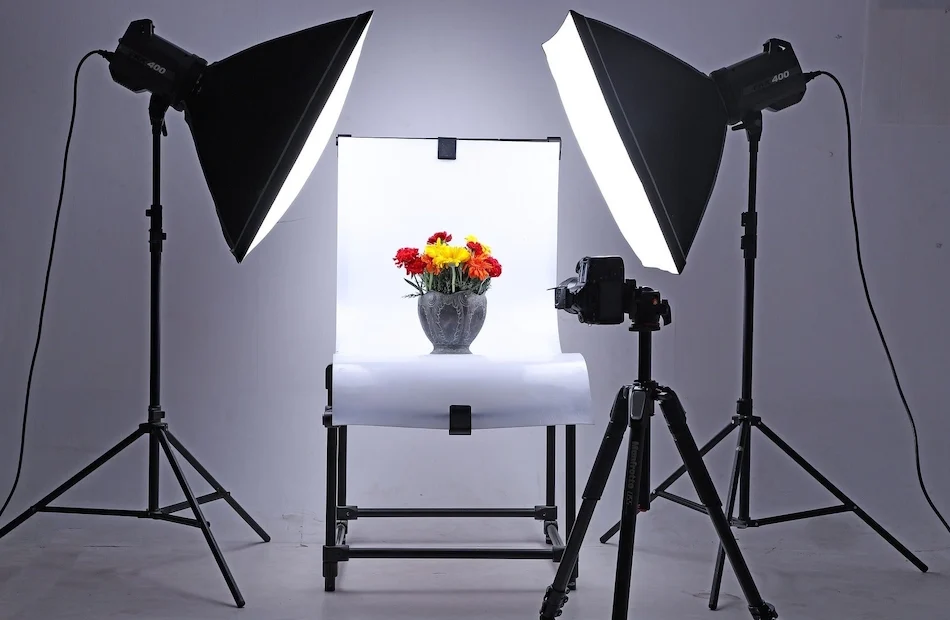
A beginner’s guide to product photography
Maybe your product listings look flat compared to competitors, or your phone shots are blurry, poorly lit, or not converting. You searched for a clear, step‑by‑step way to improve images without renting a studio or buying every gadget. This guide gives the same sequence a workshop instructor uses: gear, then light, then camera settings, then composition, then editing — with practical tips you can apply tonight.
Gear: What you actually need
Begin by buying the minimum that removes common technical problems. Buying gear before learning technique is the most common beginner mistake.
- Camera: A modern smartphone (12MP or higher) is enough to start. If you own a DSLR or mirrorless, use it — especially with a 35mm or 50mm equivalent lens for natural perspective. Don’t upgrade just to feel professional; upgrade when your workflow or style demands it.
- Tripod: Non‑negotiable. A stable camera + consistent framing = fewer wasted shots. Basic tripods cost under $30; the improvement is immediate.
- Reflectors/foam boards: Two white foam boards (or a collapsible reflector) are the easiest way to control shadows. Use one to bounce light into shadows and a black card to deepen them where needed.
- Backdrop (sweep): A seamless white or gray paper roll, a large sheet of card, or a vinyl/wood board provides a clean background. Tape it to a wall and curve it onto a table to remove the horizon line.
- Cleaning & grip kit: Microfiber cloth, compressed air or blower, painter’s tape or clamps — small things that keep the product and background spotless and fixed where you want them.
- Optional but useful: A macro lens or extension tube for small details, a small continuous LED panel (daylight balanced) for when window light isn’t available, and a polarizing filter for glossy surfaces. Ring lights and consumer lightboxes can be useful for tiny items but often create flat, uninteresting light.
Don’t buy a full studio kit on day one. Use what you have, learn why each piece helps, then add tools to solve specific problems you encounter.
Light: The single skill that changes everything
Light defines shape, texture, color, and mood. Learning to see and shape light is the fastest way to better product photos.
Start with a window
A large window on an overcast day acts like a big softbox — soft, even, flattering light. Place the product perpendicular to the window so the light grazes the surface; that side lighting reveals texture and dimension. Use a white foam board opposite the window to bounce light into shadows; move it closer to brighten or further to darken the fill.
Control color and avoid mixing sources
Different lights have different color temperatures. Mixing daylight with indoor tungsten bulbs causes colour casts that are hard to correct. Shoot with one dominant light source: either natural daylight or artificial daylight‑balanced LEDs (around 5600K). If you must mix, turn off interior lights or cover them.
Modify and shape artificial light
When you need control or consistent hours, use a continuous LED panel with a diffuser (a softbox, a white bedsheet, or a translucent shower curtain taped over a frame). Move the light to replicate the same angles you practiced with the window. Use black cards to cut unwanted bounce and create contrast; use reflectors to soften shadows.
Dealing with reflective products
For glossy metal, ceramics, or electronics, avoid direct frontal light that creates harsh hotspots. Move the light to a steeper angle or use a larger, softer surface to reflect. Consider a polarizing filter on your lens (or a circular polarizer clip for phones) to reduce unwanted reflections.
Camera settings
Master three settings and you’ll fix most technical issues. Shoot RAW if your camera or phone supports it; it gives you more flexibility in editing.
- Aperture (f‑stop): Controls depth of field. Use f/8–f/11 for product shots where you want most of the item sharp. Use wider apertures (f/2.8–f/4) for detail shots with a shallow depth of field.
- ISO: Keep ISO low (100–200) to avoid noise. If the image is dark, add light rather than raising ISO whenever possible.
- Shutter speed: On a tripod, shutter speed is what it needs to be for correct exposure. Use a timer or remote release to avoid camera shake. If you’re handheld, keep shutter speed at least 1/(effective focal length) — e.g., 1/50s for a 50mm equivalent.
- Focus and exposure lock: Use single‑point autofocus or manual focus to ensure the important part of the product is tack sharp. On phones, use exposure/AF lock to prevent the camera from changing settings between shots.
Smartphone note: Portrait/portrait‑lighting modes can simulate shallow depth of field but often mess up edges. Use them sparingly and check results closely.
Composition
Composition turns a technical photo into one that sells. Use these practical rules from workshops.
Fill the frame and build a shot list
Move closer or zoom so the product occupies roughly 70–80% of the frame; you can crop later but you can’t add detail you didn’t capture. Create a shot list before you start: front, back, side, top (flat lay), detail/texture close-up, and an in‑use or lifestyle image that shows scale or function.
Rule of thirds and perspective
Use the rule of thirds grid to place the product or its key feature on an intersection point for dynamic compositions. Keep perspective consistent across a shoot — if most images are shot slightly above the product, keep that look for the whole set.
Styling and minimal props
Props should support the story and not distract. Choose one or two materials that echo your brand (wood, marble, fabric) and keep colors muted. Remove anything in the background that isn’t intentional.
Marketplace and format considerations
Different marketplaces have rules (white backgrounds, image size/aspect ratio). Check requirements before you shoot so you frame and crop for the correct aspect ratio (square, vertical, or horizontal) and leave enough space for product details.
Post-processing
Edit to make the photo represent the real product under ideal light. Over‑editing leads to returns and unhappy customers.
- Correct white balance: Ensure colours match the product. Use the eyedropper in RAW editors or set a custom white balance when shooting.
- Exposure and contrast: Adjust exposure first, then tweak contrast. Recover highlights and lift shadows to reveal detail.
- Clarity/detail: Add a small amount of clarity or sharpening for texture, but avoid halos and noise.
- Spot cleaning: Remove dust, lint, and stray reflections with a clone or healing tool. Keep edits invisible and honest.
- Background whitening: For white-background listings, raise the whites until the backdrop reads neutral white — avoid clipping the product’s whites. Use a histogram to check for blown highlights.
- Export settings: Keep a master copy in RAW or TIFF. Export web images as sRGB JPEGs (maintain quality while keeping file size reasonable). Name files clearly for product management.
Tools: Lightroom (desktop or mobile) and Snapseed cover most needs. Use Photoshop or a dedicated retouching app only when you need to remove complex distractions or perform advanced compositing.
Your first practice assignment
Do this exact exercise once, then repeat with variations.
- Pick one product and clean it thoroughly.
- Set up on a white sweep next to your largest window on a cloudy day, or diffuse direct sun with a thin curtain.
- Place a white foam board opposite the window as a reflector; have a black card handy to control unwanted bounce.
- Mount the camera on a tripod, set ISO 100–200, aperture f/8, and shoot RAW if possible. Use exposure lock and manual focus for the key feature.
- Shoot your five‑angle shot list: front, back, side, top (flat lay), detail close‑up. Add an in‑use image to show scale or context.
- Edit for color accuracy and minor cleanup in Lightroom Mobile or Snapseed. Export as sRGB JPEG and save the RAW master.
Repeat the exercise with a different product or by moving the light source to another angle. Doing this three times lets you compare results and see which light and composition choices work best for your products.