The Ultimate Guide to Back-Button Focus
Back-button focus is one of those camera settings that sounds technical until you try it for a week. Then it becomes hard to imagine going back.
The basic idea is simple: instead of using a half-press of the shutter button to focus and take the photo, you move autofocus to a button on the back of the camera—usually labeled AF-ON or AE-L/AF-L. Your thumb handles focus. Your index finger handles the shutter.
That separation gives you more control, especially when subjects move, compositions change quickly, or your camera keeps refocusing on the wrong thing. It is useful for wildlife, sports, portraits, street photography, and plenty of everyday shooting.
It is not mandatory, and it is not automatically better for every photographer. But once you understand what it solves, you can decide whether it deserves a place in your setup.
What back-button focus actually does
With most cameras set to their defaults, a half-press of the shutter button does two jobs:
- It activates autofocus.
- It meters the scene and prepares the exposure.
Press the button fully and the camera takes the photo. This arrangement is familiar and perfectly functional, but it links focusing to every exposure. If you press the shutter again, the camera may try to focus again—even when you do not want it to.
With back-button focus, you disable autofocus from the shutter release and assign it to a rear button. The workflow becomes:
- Press the rear focus button with your thumb.
- Confirm focus where you want it.
- Release the rear button if you want to hold that focus distance.
- Take one photo or a dozen with the shutter button.
Think of it as separating two decisions: where to focus and when to shoot.
Why photographers use it
It stops unnecessary refocusing
Imagine photographing a portrait outdoors. You focus on your subject’s nearest eye, recompose slightly to place them off-center, and take the picture. With shutter-button autofocus, another half-press may cause the camera to refocus on the background, a shoulder, or a nearby branch.
With back-button focus, once focus is set, your shutter button simply takes photographs. You can shoot several frames without asking the camera to rethink the focus point each time.
It makes focus-and-recompose easier
Focus-and-recompose is particularly handy when your subject is not near an autofocus point, or when you prefer working with a single central AF point. Focus on the subject, release the rear button, recompose, and shoot.
There is one important caveat: at very wide apertures, especially close to your subject, recomposing can shift the plane of focus enough to soften the eye. If you are shooting a headshot at f/1.4, it is usually better to move the AF point directly over the eye rather than recompose heavily.
It works brilliantly with moving subjects
For birds in flight, children running through a park, cycling, motorsports, or dogs at the beach, continuous autofocus is often the right choice. Back-button focus gives you a direct way to start and stop tracking.
Set the camera to continuous AF—often called AF-C, AI Servo, or a similar name. Hold the rear button while the subject moves, and the camera continually adjusts focus. Release it when you want focus to stop changing.
This can be faster than switching between single and continuous autofocus modes for every scene. One setup can cover both:
- Press and release the back button for a still subject.
- Press and hold it to track a moving subject.
That flexibility is a major reason wildlife and sports photographers often swear by it.
It reduces accidental focus changes
Suppose you are photographing a landscape on a tripod. You focus carefully on a foreground rock, then wait for better light or a wave to break in the right place. With back-button focus, you can leave focus alone while shooting multiple frames.
The same applies to event photography. If you have pre-focused on a spot where people will walk into good light, you can wait and shoot as they arrive without the camera grabbing focus from something closer.
How to set up back-button focus
The exact menu names vary by brand and model, but the process is similar on most interchangeable-lens cameras.
- Open the camera’s custom controls, button customization, or custom function menu.
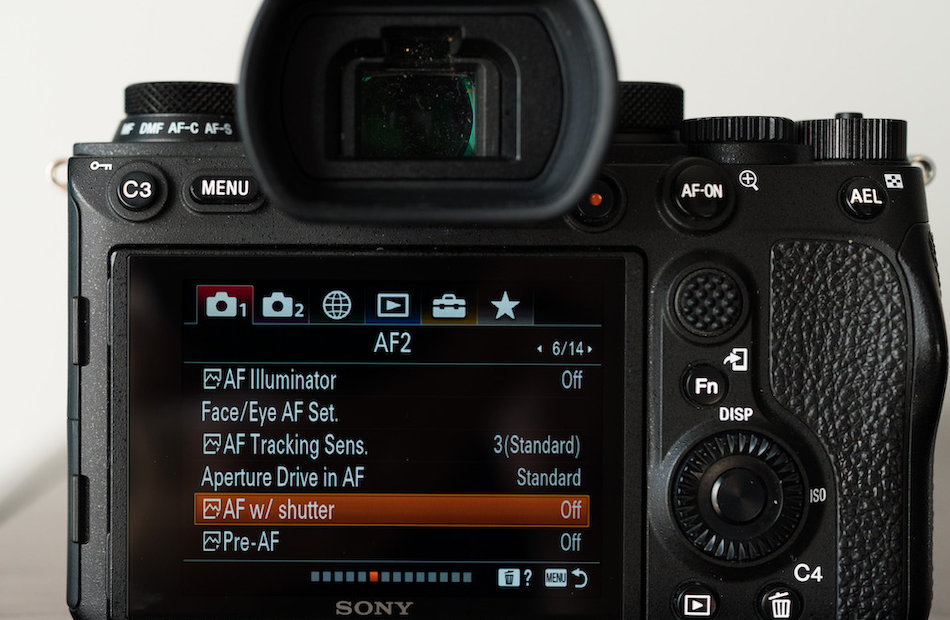
- Assign AF-ON or AF start to a rear button. Many cameras have a dedicated AF-ON button already.
- Disable autofocus activation from the shutter button. Look for an option such as shutter release: metering only or AF activation: back button only.
- Choose your autofocus mode. Start with continuous AF if you want one versatile setup for still and moving subjects.
- Test it before an important shoot. Press the back button, watch the focus indicator, then take a frame without touching the focus button again.
On cameras without a dedicated AF-ON button, the AE-L/AF-L button is often the best alternative. Some photographers also assign autofocus to the rear dial button or another programmable control, though comfort matters more than cleverness.
After setting it up, check one thing carefully: your shutter button should still wake the camera and meter the scene, but it should no longer refocus. If it does, autofocus is still assigned to the shutter in some part of the menu.
A practical starting setup
If you are new to this technique, avoid building a complicated autofocus system on day one. Use a straightforward configuration first.
- Focus mode: Continuous AF / AF-C / AI Servo
- Focus area: Single point or a small flexible zone
- Rear button: AF-ON assigned to autofocus start
- Shutter button: Metering and shutter release only
- Subject detection: Use it when it reliably finds your subject, but know how to override it
For a portrait session, select an eye-detection mode if your camera has one, place the focus area near the subject, and use the back button to acquire focus. For a static pose, release the button and shoot. For a walking subject, keep holding it as you shoot bursts.
For birds, use a larger AF area or subject-tracking mode if your camera handles it well. Hold the back button while following the bird, then fire short bursts when the pose, wing position, or background comes together.
When back-button focus can be awkward
Back-button focus has a learning curve. Your thumb has to develop a new habit, and the first few sessions can feel clumsy. It is common to raise the camera, press the shutter, and wonder why nothing is sharp. Your thumb simply forgot its new job.
It can also be less convenient in a few situations:
- Handing your camera to someone else: A friend taking a quick photo may not understand why the shutter button does not focus.
- Very casual snapshots: If you shoot occasionally and want the simplest possible operation, default shutter focus may suit you better.
- Gloves or limited hand mobility: Reaching and holding a rear button may be uncomfortable.
- Some video workflows: Depending on the camera, you may prefer a separate focus method for video shooting.
There is no prize for using back-button focus. If it makes you miss pictures or distracts you from seeing the scene, switch back. Camera settings should support your way of working, not turn every walk with a camera into an endurance test.
Common mistakes to avoid
Using the wrong autofocus mode
Back-button focus does not fix poor autofocus choices. If you are photographing a stationary building in single AF, it will work well. If you are tracking a running child, switch to continuous AF. The rear button controls when focus starts; the AF mode controls how the camera behaves once it starts.
Relying on focus-and-recompose at shallow depth of field
As mentioned earlier, a small recomposition can matter when depth of field is extremely thin. For close portraits at f/1.2, f/1.4, or f/1.8, place the active AF point over the eye whenever possible.
Forgetting to release the button
In continuous AF, holding the back button tells the camera to keep updating focus. If you recompose while still holding it, the camera may follow a different subject or refocus on the background. Release the button when you want to lock the current distance.
Changing settings right before paid work
Do not first try back-button focus at a wedding, a once-only wildlife encounter, or a client shoot. Practice at home, photograph a pet, or spend an hour at a local park. Build the thumb habit when the stakes are low.
A simple one-week practice plan
Give the technique enough time to become natural. A single ten-minute test is rarely enough.
- Day 1: Photograph static objects around your home. Focus, recompose, and take several frames without refocusing.
- Day 2: Photograph people or pets moving slowly. Practice holding the rear button to track them.
- Day 3: Shoot in lower light and pay attention to where your camera locks focus.
- Days 4–5: Use it on a normal photo walk. Do not switch back at the first awkward moment.
- Days 6–7: Review your images. Look for missed focus, but also note whether you had more control over the frames you wanted.
By the end of the week, the answer is usually clear. Either your thumb will start finding the button automatically, or the method will feel like an unnecessary extra step. Both outcomes are useful.
Make the setting serve the photograph
Back-button focus is most valuable when it removes friction: holding focus on a planned composition, tracking a subject through clutter, or shooting several frames without the camera second-guessing you.
Try it on your next photo walk, preferably with a mix of still scenes and moving subjects. You may find that separating focus from the shutter changes more than a button assignment—it changes how deliberately you work. What could you photograph differently if your camera stopped refocusing every time you decided to press the shutter?