how to retouch photos in Photoshop
Good photo retouching should be difficult to spot. The aim is not to make a person look like someone else, or to polish every surface until it looks synthetic. It is to guide attention, remove distractions, and preserve the character of the original photograph.
Learning how to retouch photos in Photoshop starts with a simple principle: make small, reversible adjustments in a logical order. A strong portrait, product image, or lifestyle photograph usually needs less editing than expected. The better the lighting, exposure, styling, and composition at capture, the more restrained the retouch can be.
Start with the best possible file
If you photographed in RAW, begin in Adobe Camera Raw before opening the image in Photoshop. RAW processing is the right place for broad corrections: white balance, exposure, highlight recovery, shadow detail, lens corrections, and basic colour adjustments.
For example, a backlit outdoor portrait may need slightly lower highlights to hold detail in a bright sky, while the subject’s face may benefit from a modest shadow lift. Make these corrections carefully. Raising shadows too aggressively can reveal noise and make an image look flat.
Before opening the file, check these essentials:
- Set a believable white balance, especially for skin tones.
- Correct exposure without clipping important highlights.
- Apply lens profile corrections if available for the lens used.
- Check for chromatic aberration along high-contrast edges, such as hair against a bright background.
- Keep sharpening and noise reduction moderate; final sharpening is better handled near the end.
Open the image as a Smart Object if you want the option to return to Camera Raw settings later. This is particularly helpful when a retouch changes the way you perceive the overall brightness or colour balance.
Build a non-destructive Photoshop retouching workflow
A clean layer structure makes retouching easier to revise and prevents permanent damage to the original pixels. Avoid making direct edits on the Background layer whenever possible.
A practical starting setup is:
- Keep the original image layer untouched.
- Create an empty layer above it for small cleanup work.
- Add separate layers for more involved corrections, such as cloning or dodge and burn.
- Use adjustment layers for tonal and colour changes.
- Name layers as you work, especially on complex files.
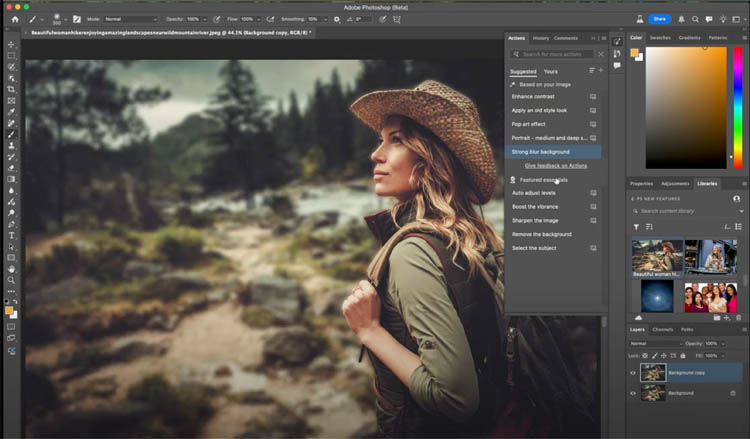
For cleanup layers, set the Healing Brush or Clone Stamp tool’s sample option to Current & Below. Photoshop will use visible image information from lower layers while placing the correction on the empty layer above. If a correction looks wrong later, you can erase, mask, reduce opacity, or delete it without harming the photograph underneath.
Remove temporary distractions first
The first stage of photo retouching is usually cleanup. This means removing details that are temporary, accidental, or visually distracting: a small blemish, a stray thread on clothing, sensor dust in a sky, or a piece of litter near the edge of a scene.
Use the right tool for the correction
The Spot Healing Brush is useful for small, isolated marks with simple surrounding texture. A temporary pimple on a cheek or a dust spot in an even sky can often be removed with one click.
The Healing Brush gives more control because you choose the sample area. It is often better around textured surfaces, patterned clothing, or skin where nearby colour and texture vary.
The Clone Stamp copies pixels directly. It is useful when healing tools create smudging or repeat unwanted texture. Use a soft-edged brush, keep the opacity low when necessary, and resample frequently. Cloning the same area repeatedly can produce obvious patterns.
For larger unwanted objects, Photoshop’s content-aware tools can provide a useful starting point, but inspect the result at both 100% view and fit-to-screen view. A convincing removal must match texture, light direction, shadow, and perspective.
Retouch skin without erasing texture
Skin retouching is where many edits become overdone. Skin naturally contains pores, fine lines, colour variation, and tiny highlights. Blurring all of that may look smooth at first, but it rarely holds up at normal viewing size.
Start by removing only short-term blemishes and obvious distractions. Then assess unevenness in tone rather than trying to eliminate texture. Under-eye darkness, redness around the nose, or a slightly brighter patch on the forehead can often be softened with subtle tonal work.
Use dodge and burn for natural shaping
Dodge and burn means selectively lightening and darkening areas of an image. It is one of the most controlled methods for portrait retouching because it changes perceived tone while leaving skin texture intact.
Create two Curves adjustment layers: one slightly brighter and one slightly darker. Fill each layer mask with black so the adjustment is hidden, then paint gently on the masks with a soft white brush at low flow. Paint on the brighter Curves mask to lift dark spots; paint on the darker mask to reduce small bright patches.
Work slowly at low zoom as well as close view. At 100%, you can see texture and edge detail. Zoomed out, you can judge whether the face still has natural shape and whether the corrections are visible from a normal viewing distance.
Frequency separation is sometimes used for skin retouching because it separates colour and tone from fine texture. It can be useful in experienced hands, but it is easy to create waxy skin, halos, or uneven texture. For many photographs, careful healing and dodge and burn produce a more natural result with fewer problems.
Refine eyes, teeth, hair, and clothing carefully
Small local adjustments can strengthen a portrait, but subtlety matters. Eyes are a natural focal point, so they deserve attention without becoming unnaturally bright or sharp.
Instead of painting white over the eyes, use a masked Curves or Levels adjustment layer to lift the whites very slightly. Keep the adjustment away from eyelids and catchlights. If the iris needs a little definition, add a gentle local contrast adjustment rather than heavy saturation or aggressive sharpening.
Teeth can be corrected in a similar way. If they look too warm under indoor lighting, use a selective adjustment with a mask rather than globally desaturating yellows. Pure white teeth usually look less believable than a modest reduction in colour cast.
For flyaway hair, do not feel obliged to remove every strand. A few stray hairs often look natural, particularly in outdoor portraits made with shallow depth of field. Remove only the hairs that cross important facial features or create distracting shapes against the background.
On clothing, use healing or cloning to remove small marks, lint, and creases that pull attention away from the subject. Be cautious around seams, fabric patterns, and edges, where automated corrections can distort the garment’s structure.
Make global colour and contrast adjustments last
Once the detailed retouch is complete, return to the whole image. A cleanup pass can change the visual balance of a photograph, so this is the time to refine contrast, colour, and the relationship between subject and background.
Adjustment layers are ideal for this stage. Curves can add controlled contrast, Hue/Saturation can tame an overly strong colour, and Selective Color can help correct a colour cast in particular ranges. Use masks when an adjustment should affect only the background, clothing, or a specific part of the frame.
For a portrait shot at f/1.8 with a soft background, the subject may already separate well. It might only need a slight reduction in background brightness or saturation. In a flatter image shot in overcast light, a restrained contrast curve can restore depth without making shadows blocky.
Do not assume every image needs a dramatic colour grade. A consistent look should support the mood of the photograph and the intent of the shoot, not distract from it.
Sharpen for the final output
Sharpening should be one of the final steps because resizing changes how much sharpening an image needs. A file prepared for a large print needs a different approach from one intended for a small social media upload.
Create a merged copy of your visible layers on top of the stack, then apply sharpening non-destructively if your workflow allows. Keep sharpening targeted toward useful detail such as eyes, eyelashes, hair, fabric texture, or product edges. Avoid sharpening smooth skin, noise in shadow areas, and out-of-focus backgrounds.
Check the image at the size it will actually be viewed. A retouch that looks refined at 200% may appear too sharp, too smooth, or too contrasty when exported for the web.
Know when to stop retouching
The final check is less about Photoshop tools and more about judgment. Toggle your retouch layers on and off. If the photograph now looks cleaner, more balanced, and still recognisably like the original subject or scene, the edit is probably working.
If the changes are obvious before someone notices the photograph itself, reduce the layer opacity, soften the mask, or undo the last step. The most effective Photoshop retouching often feels almost invisible: the viewer sees a confident image, not the work done to create it.