Shadows as the Subject: The Creative Power of Darkness
Darkness can do more than hide a background. In low-key photography, shadow becomes an active part of the frame: it shapes mood, directs attention, conceals information, and asks the viewer to look longer. A face emerging from black, a hand caught in a narrow strip of window light, or a figure reduced to an outline can feel more involving than a scene where every detail is visible.
That is the creative strength of darkness. It turns photography away from simple description and toward suggestion. Instead of showing everything, the photographer decides what the viewer is allowed to know.
Why shadows hold attention
A bright, evenly lit photograph often delivers its information immediately. That can be useful for portraits, travel images, product work, and documentary scenes where clarity matters. But when part of the scene disappears into shadow, the image gains a question.
Who is standing in the doorway? What is beyond the lit edge of the room? Why is one eye visible while the other is lost in darkness? The viewer begins to complete the picture mentally, and that participation can make an image more memorable.
Shadows also simplify. A cluttered location can become more graphic when only the important lines and illuminated forms remain. In a portrait, darkness may remove distracting clothing, background detail, or unwanted visual weight. In street photography, it can turn an ordinary passer-by into a shape moving through architecture.
Low-key lighting is not simply underexposure. It is a deliberate visual choice in which most of the frame is dark, while the available light is controlled to reveal selected details. The goal is not to make a technically dark file; it is to make darkness feel purposeful.
What film noir can teach modern photographers
Film noir remains a useful reference point because its visual language is built on contrast, concealment, and tension. Classic noir imagery often uses hard side light, deep shadows, blinds, door frames, smoke, wet streets, and isolated figures. These elements are not only decorative. They create a world where information feels incomplete and danger may sit just outside the frame.
You do not need trench coats or a period setting to borrow from that approach. The important lesson is to use light as a narrative tool.
- Hard light creates separation. A bare flash, focused LED, or direct sun through a window can carve sharp edges across a face or wall.
- Side lighting suggests complexity. Light from 90 degrees to the subject can reveal one side while allowing the other to fall away.
- Patterns introduce unease or structure. Venetian blinds, railings, leaves, curtains, and window frames can break light into purposeful shapes.
- Negative space creates isolation. A small lit subject surrounded by darkness can appear vulnerable, private, or distant.
Think of noir less as a costume and more as an approach to visual storytelling. The lit area should carry the essential information. Everything else should either support the mood or remain unknown.
Use mystery without losing the photograph
Hidden detail is powerful only when the visible detail gives the image a foundation. If every part of the frame is unreadable, the result may feel accidental rather than mysterious.
Start by identifying the visual anchor. In a portrait, it might be one eye, the curve of a cheek, or the catchlight on a pair of glasses. In a silhouette, it is usually the contour of the body or object. In an interior scene, it may be a patch of light on a table, a person at the end of a corridor, or a single open door.
Give the viewer one clear place to begin
Dark images benefit from a strong first point of attention. This can be the brightest area, the sharpest detail, a face, or a clean geometric shape. Once the viewer has found that element, the surrounding darkness can do its work.
For example, photographing a musician backstage with only a dressing-room mirror bulb visible may reveal a hand, part of an instrument, and a narrow edge of the face. The viewer understands the setting without needing to see the whole room. If the bulb is the only bright object, however, it may become the subject instead of the musician. A small adjustment in position or exposure can keep attention where it belongs.
Keep silhouettes recognisable
A silhouette works when the outline communicates something specific. A person standing square to the camera with arms close to their sides may read as an indistinct dark shape. Turn the body slightly, separate the arms from the torso, or wait for a walking stride. These small changes make the gesture legible.
Profile views are especially effective because the forehead, nose, chin, and neck create an immediately readable shape. With couples or groups, leave visible gaps between heads and bodies so the figures do not merge into one block.
Look for a bright background rather than trying to light the subject. A doorway, pale curtain, bright sky, reflective water, or sunlit wall can provide the separation needed for a clean silhouette.
Exposure choices: protect the mood, not every shadow
Digital cameras encourage photographers to recover dark areas later, but low-key photography often looks stronger when the shadows are allowed to remain dark. The key is deciding which tones should retain detail and which can fall to black.
Start by exposing for the important highlight. If a face is lit by a small window, meter from the illuminated skin rather than the dark room around it. If a person is silhouetted against sunset, meter for the sky or use exposure compensation to darken the overall exposure until the subject loses detail.
Review the histogram, but interpret it in context. A low-key image may legitimately show a large concentration of tones toward the left side. That alone does not mean the exposure is wrong. What matters is whether the highlights you need are clipped and whether the image still has enough tonal structure to feel intentional.
A practical starting point for low-key portraits
Place the subject near a window or use a single light source from the side. Turn off room lights that flatten the scene. Position the subject so the light reaches only part of the face, then use the background distance to your advantage: a darker, more distant background will disappear more easily.
- Set your camera to manual exposure or use exposure compensation in aperture priority.
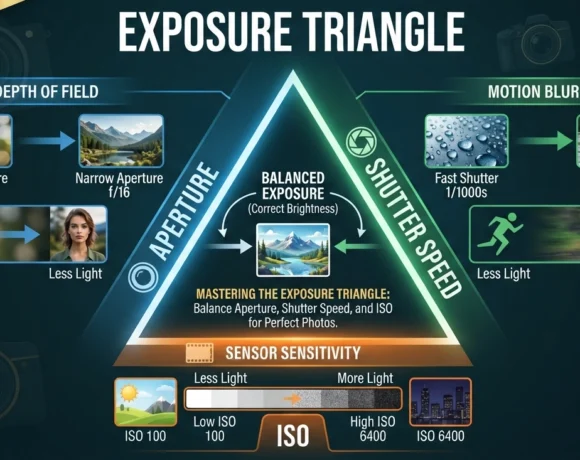
- Choose an aperture based on the look you need. Around f/2 to f/2.8 can isolate a face; f/4 to f/5.6 may be better when both eyes and more of the scene need definition.
- Set a shutter speed that suits the subject. For a still portrait, 1/125 second is a sensible starting point; use faster speeds for movement.
- Raise ISO only as far as needed for the shutter speed and aperture. Some noise can suit a moody image, but heavy noise may muddy subtle shadow transitions.
- Expose for the lit skin, then make a test frame and check that the brightest facial areas retain texture.
If the light is very contrasty, a reflector or a white wall on the shadow side can add a faint lift without destroying the low-key effect. This is often more useful than adding a second bright light. The goal is not to eliminate shadow, but to control how quickly the tones disappear.
Working with hard and soft darkness
The character of a shadow depends on the size and distance of the light source. A small source relative to the subject, such as bare flash or direct midday sun, produces hard-edged shadows. This works well for graphic portraits, noir-inspired scenes, and architectural compositions.
A larger source, such as an overcast window, softbox, or light bounced from a wall, creates gentler transitions. Soft low-key lighting can feel quieter and more intimate. It is useful when you want a portrait to retain detail in the dark side of the face while still keeping the overall frame subdued.
Neither approach is automatically more dramatic. Hard light tends to announce itself, while soft light asks the viewer to notice gradual changes in tone. Match the quality of light to the story. A tense urban portrait may suit sharp contrast; a reflective portrait at home may need a softer falloff.
Composition matters more when the frame is dark
When much of an image is black or near-black, every visible element carries extra weight. Check the edges of the frame carefully. A small bright object, a partial lamp, or a pale strip of wall can pull attention away from the intended subject.
Use darkness to frame the image. Shoot through a doorway, behind a foreground object, or from inside a dim room toward a lit scene. Place the subject near the edge of a pool of light rather than always in its centre. Let a diagonal shadow lead toward the face, hand, or figure.
Black-and-white can be a natural fit for this work because it removes colour distractions and makes luminance relationships more obvious. But colour can be equally effective when used sparingly: warm window light against a cool blue evening, a red sign in a dark street, or green fluorescent light in an otherwise empty corridor. The point is not to make the shadows colourful, but to ensure colour has a role.
Editing without explaining away the darkness
When processing low-key photographs, resist the reflex to raise the shadows globally. That adjustment can quickly flatten the very atmosphere you worked to create.
Instead, begin with the overall exposure and black point. Deepen blacks carefully if they are grey and lifeless, but avoid crushing important edges that define the subject. Then use local adjustments to refine the image: brighten an eye slightly, reduce a distracting highlight, or add modest texture where a key surface needs to remain visible.
Pay attention to colour noise in dark areas, particularly at higher ISO settings. Noise reduction can help, but excessive smoothing may make shadows look plastic. A little grain, especially in black-and-white work, can support the atmosphere if it does not obscure the important forms.
The strongest shadow photographs do not treat darkness as missing information. They use it as visual language. Show the viewer enough to establish the moment, then let the unlit parts carry the tension, privacy, and imagination that a fully illuminated frame cannot provide.