The Ultimate Guide to Adobe Lightroom Workflow
A messy Lightroom library makes every part of photography slower. Images go missing, edits become inconsistent, and a simple client export turns into a hunt through folders and half-finished adjustments. A dependable Adobe Lightroom workflow solves those problems by giving every shoot the same path: ingest, back up, cull, edit, organise, export, and archive.
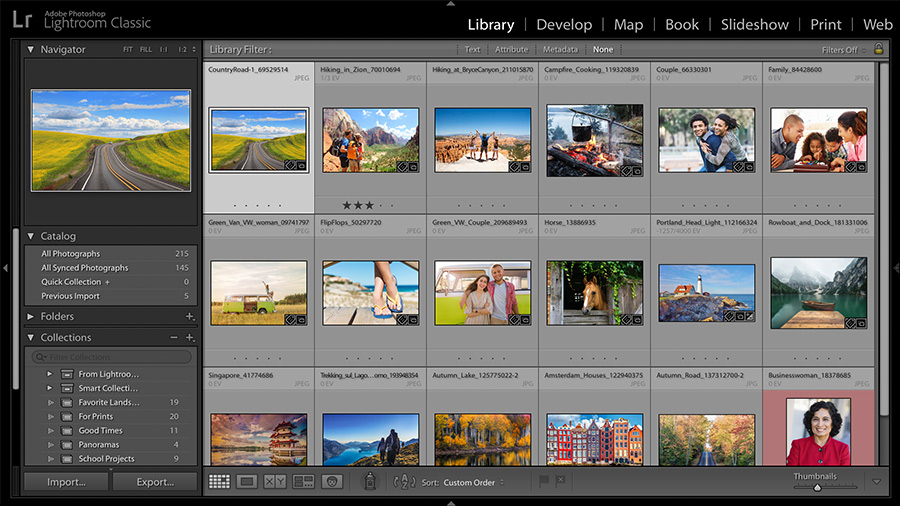
This guide focuses on Lightroom Classic, the desktop-based version of Adobe Lightroom that uses catalogs, folders, Collections, and the Develop module. The cloud-focused Lightroom app works differently, although the same habits around file naming, culling, editing, and backups still apply.
Start With a Safe Lightroom Catalog Setup
A Lightroom Classic catalog is a database, not a folder containing your photographs. It records where your image files are stored and saves information such as edits, ratings, keywords, Collections, and metadata. Your original files normally remain in the folders you choose on your drive.
For most photographers, one main catalog is easier to search and maintain than a separate catalog for every year or project. Multiple catalogs can make sense for strict separation between personal and business work, or for large archives that must stay on separate storage. The important point is to choose a system you can follow consistently.
- Keep the catalog on a fast local drive. An internal SSD is usually the most responsive option.
- Store photo originals where capacity allows. This may be an internal drive, external SSD, or larger external hard drive.
- Back up the catalog regularly. Catalog backups protect your Lightroom work, but they do not replace backups of the original image files.
- Keep a second copy of your photographs. Ideally, that copy is on a separate drive and not permanently connected to the computer.
- Use a consistent catalog name and location. Avoid moving or renaming catalog files in your operating system after setup.
Lightroom Classic can write adjustment and metadata information to XMP. For many proprietary RAW formats, this creates a small sidecar file beside the original photo. For some file types, metadata may be written within the file itself. This can provide an additional record of edits, but it is not a replacement for catalog backups and may slow down some workflows.
Import Photos With a Repeatable Structure
Importing is where a clean Lightroom workflow begins. If every shoot arrives with a sensible folder name, basic metadata, and a backup plan, you will spend far less time searching for images later.
Copy files from cards instead of moving them
When importing from a memory card, use Copy. Lightroom copies the files to your chosen destination while leaving the card untouched until you confirm that the import and backup are complete. Avoid deleting a card in-camera until you have checked that the images exist in at least two locations.
Copy as DNG is also available in Lightroom Classic. It can suit photographers who want to convert supported RAW files to Adobe DNG during import, but it adds time and changes the files you keep as originals. Standard Copy is the simplest choice when you want to preserve the camera files exactly as recorded.
Use folder names that make sense outside Lightroom
A date-first folder structure is reliable because it sorts naturally and remains readable even if you open the drive without Lightroom. A practical format is:
2026-08-25_Family-Smith
You might place those shoot folders within year folders, such as:
Photos > 2026 > 2026-08-25_Family-Smith
Use names that identify the session, location, client, or subject. Avoid vague folder names such as New Photos or Final Edits.
Add metadata at import
Create a metadata preset that adds your name, copyright information, website, and contact details where appropriate. This is one of the most useful Lightroom Classic import presets because it applies information consistently without extra work on every image.
You can also apply keywords during import for broad categories, such as wedding, wildlife, travel, or a client name. Keep these import keywords general. Add more specific keywords later only to the photographs that deserve them.
Cull Before You Begin Editing
Culling is the process of deciding which photos are worth your attention. It is faster and less draining to reject duplicates, missed-focus frames, accidental shots, and weak variations before opening the Develop module.
A simple two-pass culling process works well:
- Make a quick first pass through the entire shoot. Press P for a Pick and X for a Reject. Do not stop to adjust exposure or compare every detail.
- Filter to your Picks and make a second pass. Add star ratings to identify the images you will edit, deliver, print, or include in a portfolio.
There is no perfect rating system. What matters is that each rating has a fixed meaning. For example, three stars could mean ready to edit, four stars could mean ready to deliver, and five stars could mean portfolio-worthy. Once you define your system, use it for every shoot.
Use Survey View when comparing several near-identical frames. It helps you choose the strongest expression, composition, or moment without opening each image individually. For close comparisons between two images, Lightroom Classic also offers Compare View.
Edit in a Consistent Order
Editing becomes more efficient when you follow the same sequence. This reduces the temptation to repeatedly revisit earlier adjustments after making local changes or colour effects.
Apply technical corrections first
- Choose a suitable Profile for the image. Profiles affect the starting appearance without moving the usual Develop sliders.
- Correct white balance. Use the eyedropper on a neutral area when one is available, then adjust by eye for the intended mood.
- Set exposure, then refine highlights, shadows, whites, and blacks.
- Crop and straighten the photograph. Doing this early makes later local adjustments more accurate.
- Review lens corrections, geometry, and chromatic aberration where needed.
- Apply sharpening and noise reduction at a sensible viewing size. Do not judge fine-detail settings while zoomed too far out.
Texture, Clarity, and Dehaze can be useful, but they are easy to overuse. A small adjustment often adds enough definition. Excessive use can create harsh edges, unnatural skin, noisy skies, or muddy colour.
Refine colour with purpose
The Color Mixer lets you adjust individual colour ranges through hue, saturation, and luminance. It is useful when a specific colour needs correction, such as overly bright foliage or distracting orange skin tones. Make small changes and check the whole image, because one adjustment can affect several objects in the frame.
The Color Grading panel is better suited to a broader creative look. Use it to gently influence shadows, midtones, and highlights rather than forcing every image into a heavy style. Consistency is usually more valuable than dramatic colour treatment.
Use masks for local adjustments
Lightroom Classic masking tools can select subjects, skies, backgrounds, and people in many images. They are a fast starting point, not a reason to skip inspection. Zoom in around hair, hands, glasses, horizon lines, and complex edges before assuming a mask is accurate.
Use masks to solve a specific problem: brighten a face, recover a sky, reduce background distraction, or guide the viewer toward the subject. You can add or subtract areas from a mask and combine selections when an automatic selection needs refinement.
Create Presets That Do Not Cause Problems
Presets save time when they capture repeatable choices. A useful Lightroom preset might include a preferred profile, modest tone curve, colour treatment, lens corrections, or a starting point for black and white work.
Be selective about what a preset includes. Exposure, white balance, crop, masking, and healing adjustments are often image-specific. Including them in a general preset can create more correction work than it saves. Build separate presets for different purposes rather than one oversized preset that changes everything.
Sync Similar Images Carefully
Batch editing is one of Lightroom Classic’s biggest time-savers. Edit one representative image from a sequence, select the related images, then use Sync Settings to apply the useful adjustments across the group.
Settings that often sync well include profiles, tone curves, lens corrections, Color Mixer adjustments, Color Grading, and sharpening preferences. Exposure and white balance may also work when light was stable, but they should be checked image by image. Crops, masks, healing, and transform settings need particular care because composition changes between frames.
For a fast series captured in the same light, use the edited photo as the active image before syncing. Then review the batch in Grid view and correct any obvious outliers rather than trying to perfect every frame from scratch.
Organise With Collections, Keywords, and Filters
Folders show where files physically live on your drive. Collections are virtual groups inside Lightroom Classic. A photograph can appear in several Collections without creating duplicate original files.
Collections are ideal for client selections, print orders, portfolio candidates, social media groups, and ongoing projects. Collection Sets can keep related Collections together, such as one set for each client or event.
Smart Collections automatically collect photos that match rules you set. For example, you could create a Smart Collection for five-star photos, images with a specific keyword, or photos edited during a certain period. They are particularly helpful for maintaining a portfolio shortlist without manually adding new work every time.
Keywords are worth adding to your best and most reusable images. Think in terms of future searches: location, person, subject, event, season, or genre. Do not try to keyword every frame in a large shoot. Prioritise delivered work, portfolio images, stock submissions, and photographs you may need to find again.
Export for the Destination
Export settings should match how the file will be used. There is no single best export preset for every situation.
- Online sharing: JPEG, sRGB colour space, and pixel dimensions appropriate for the website or platform. Use output sharpening for screen when it suits the image.
- Client delivery: Follow the client, gallery service, or print lab requirements. If no requirements are provided, high-quality JPEG files in sRGB are broadly compatible.
- Printing: Ask the print provider for its preferred file type, colour space, size, and sharpening guidance. Do not assume Adobe RGB or TIFF is required.
- Archival edited masters: Keep the original RAW files, catalog backups, and any high-resolution exported files you genuinely need. Avoid treating a small social media JPEG as your only finished copy.
Save recurring settings as Export Presets. Create clearly named presets such as Web JPEG, Client Full Resolution, and Print Lab. This prevents accidental exports at the wrong size or in the wrong colour space.
Finish Every Shoot With an Archive Routine
A Lightroom workflow is incomplete until the work is safely stored. After delivery, confirm that the original files, Lightroom catalog, and important exports are backed up. Keep your folder structure intact rather than moving files around outside Lightroom Classic, which can cause missing-folder warnings.
Review your workflow occasionally, especially when a step repeatedly slows you down. A better import preset, clearer rating system, or more reliable export preset can remove a surprising amount of friction. The goal is not to make Lightroom complicated. It is to make the routine predictable, so you can spend more time photographing and less time managing files.
A practical Lightroom Classic workflow for importing, backing up, culling, editing, organising, syncing, and exporting photographs efficiently. Adobe Lightroom, Lightroom Classic, photo editing workflow, photography organisation, photo culling, Lightroom presets Build a reliable Lightroom Classic workflow for importing, culling, editing, organising, backing up, and exporting your photos.