Configure Manual Mode Settings to Shoot Like a Pro
Manual mode photography is not about making every frame slower or more complicated. It is about deciding what matters in a scene, setting the camera around that priority, and keeping the result consistent while you work.
Once you stop treating aperture, shutter speed, and ISO as three separate problems, manual mode becomes far less mysterious. You choose the creative setting first, protect the sharpness you need, then use the remaining control to bring the exposure where it belongs.
Why Shoot in Manual Mode At All
Manual mode gives you consistent, intentional control over exposure and creative look. Unlike automatic or semi-automatic modes, it will not change your settings because a bright shirt, dark wall, or patch of sky enters the frame.
That consistency is especially useful when the light stays stable. Think of a portrait session under open shade, a product shoot near a window, a concert with fixed stage lighting, or a landscape at sunrise. Once your exposure is set, every frame starts from the same baseline.
Manual mode also makes cause and effect easier to understand. If a photo is too dark, too noisy, or blurry, you can identify which setting caused the problem and correct it deliberately.
The Exposure Triangle, Explained Simply
The exposure triangle is the relationship between aperture, shutter speed, and ISO settings. Together, they determine how bright or dark your image appears.
- Aperture controls how wide the lens opening is. It affects brightness and depth of field.
- Shutter speed controls how long the camera gathers light. It affects brightness and motion blur.
- ISO controls how strongly the camera amplifies the captured signal. It affects brightness and visible noise.
Each setting compensates for the others. If you use a faster shutter speed to freeze action, less light reaches the sensor. You may need a wider aperture, a higher ISO, or both. If you close the aperture for a deep landscape, you may need a longer shutter speed or a higher ISO.
The important part is that not all three settings deserve equal priority in every scene. Your subject decides the order.
Setting Aperture First: Controlling Depth of Field
Start with aperture when the amount of background blur or scene-wide sharpness is your main creative decision.
For portraits, a wider aperture can soften distracting backgrounds and separate the subject from the setting. For a group portrait, you may need a narrower aperture so multiple faces remain sharp. For landscapes, architecture, and environmental scenes, a narrower aperture often gives you more depth of field from foreground to background.
There is no single best f-number. Distance matters too. A wide aperture focused on a nearby face can create very shallow focus, while that same aperture focused on a distant subject may keep much more of the scene clear.
What aperture changes next
After choosing your aperture, check what shutter speed is required for a correct exposure. If the shutter speed becomes too slow for your subject or your handholding ability, raise ISO or reconsider the aperture.
For example, if you are photographing a person beside a window, you might choose a moderately wide aperture for a soft background. If that produces a shutter speed too slow to keep their eyes sharp, increasing ISO is usually a better compromise than accepting motion blur.
Setting Shutter Speed: Freezing or Blurring Motion
Choose shutter speed first when motion is the non-negotiable part of the photograph. Sports, children, pets, street scenes, wildlife, water, and moving vehicles all demand a decision about movement before anything else.
A faster shutter speed freezes more motion. A slower shutter speed records movement as blur. Neither is automatically better. A runner with crisp detail needs a different shutter speed from a waterfall photographed with intentional flowing blur.
You also need to account for camera movement. Longer focal lengths magnify small shakes, and a moving subject can blur even when the camera is steady. Image stabilization can help with camera shake, but it does not freeze a person walking or a bird changing direction.
Let the scene set the order
- Portraits: Choose aperture for depth of field, then select a shutter speed that keeps the subject sharp.
- Sports and wildlife: Set the shutter speed needed for the action, then open the aperture as needed and raise ISO if light is limited.
- Landscapes on a tripod: Choose aperture for depth of field and ISO for image quality, then let shutter speed take the time it needs.
- Handheld street photography: Decide how much motion you can tolerate, set a practical shutter speed, and work from there.
This decision-making order is the practical side of camera settings. It prevents the common habit of randomly changing every control and hoping one combination works.
Setting ISO Last: Balancing Noise and Brightness
ISO is often the last lever because it does not directly create a visual effect you usually want. It helps you reach the aperture and shutter speed you need when the available light is limited.
Start at your camera’s lower native ISO when light allows. Raise ISO when a wider aperture is not appropriate, the shutter speed is becoming too slow, or the scene is simply darker than your preferred settings can handle.
Higher ISO can add visible noise, reduce fine detail, and limit how much you can recover in editing. But a slightly noisy sharp image is generally more useful than a clean image ruined by subject motion.
Acceptable noise is personal and camera-dependent. Test your own camera: photograph the same scene across several ISO values, inspect the files at the size you normally deliver or print, and note where the trade-off stops looking good to you. Do not judge solely by extreme pixel-level zooming.
Reading Your Light Meter and Histogram
Your camera meter gives you a fast starting point. In manual mode, it usually appears as a scale in the viewfinder or on the rear display. Moving toward the center suggests the camera believes the scene is evenly exposed.
But the meter is not a command. It tries to interpret every scene as a middle brightness. Snow, white walls, dark clothing, night scenes, and backlit subjects can fool it. A bright snowy scene may need to sit above the center point to look bright, while a dark stage may need to sit below it to stay dark.
The LCD preview is useful for composition and quick checks, but it is unreliable for judging brightness. Screen brightness settings, glare, and bright daylight can make an underexposed image look fine or a correctly exposed image seem too bright.
Use the histogram to verify exposure. It displays the distribution of tones from dark on the left to bright on the right.
- A graph pressed hard against the left edge may indicate blocked shadows.
- A graph pressed hard against the right edge may indicate clipped highlights.
- A histogram does not need to form a perfect hill. A dark scene should have more dark tones, and a bright scene should have more bright tones.
If preserving bright detail matters, enable highlight warnings if your camera offers them. Then adjust exposure before important highlight areas lose detail. The histogram is a far more dependable exposure check than the LCD alone, particularly outdoors.
A Practical Workflow: Setting Up Manual Mode Step by Step
Use this repeatable workflow whenever you enter a new lighting situation.
- Read the scene. Ask what must be sharp, what can blur, and whether background separation or deep focus matters.
- Set your first priority. Choose aperture for depth of field or shutter speed for motion, depending on the subject.
- Set a sensible ISO starting point. Keep it low in plentiful light, or choose a higher starting point when you already know the location is dim.
- Adjust the remaining exposure control. Use the meter as a starting guide, then make the scene look appropriately bright or dark.
- Check the histogram. Look for unwanted clipping, especially in important highlights.
- Take a test frame and refine. Change one thing at a time so you understand the result.
- Lock in the exposure while the light stays constant. Recheck only when you move into different light or the light itself changes.
Example: outdoor daylight portrait
Choose an aperture that gives the background blur and facial depth of field you want. Set a shutter speed that will hold the subject sharply if they move or gesture. Start with a low ISO, then increase it only if the shutter speed is too slow. Check the histogram before beginning the session, especially if the subject is backlit.
Example: indoor low-light event
Start with shutter speed because people move. Open the aperture as much as your composition and focus needs allow. Raise ISO until the meter and histogram show a workable exposure. If the venue lighting changes from one area to another, reset your exposure as you move rather than trusting the original settings.
Common Manual Mode Mistakes and Quick Fixes
- Changing every setting at once: Pick the priority first, then adjust one variable at a time.
- Using too slow a shutter speed: Raise ISO, open the aperture, use support, or embrace intentional blur instead of accidental blur.
- Forgetting a high ISO from the previous shoot: Make ISO part of your pre-shoot check every time.
- Trusting the LCD in sunlight: Use the histogram and highlight warnings to judge exposure.
- Ignoring white balance: Set an appropriate white balance or shoot RAW when you expect to correct color later. Mixed lighting still deserves attention because it can complicate editing.
- Checking every frame for too long: Review a test image, confirm exposure and focus, then return your attention to the scene.
- Not resetting after changing locations: Manual mode holds settings exactly as you left them. Treat every major change in light as a fresh setup.
Build muscle memory, not just exposure knowledge
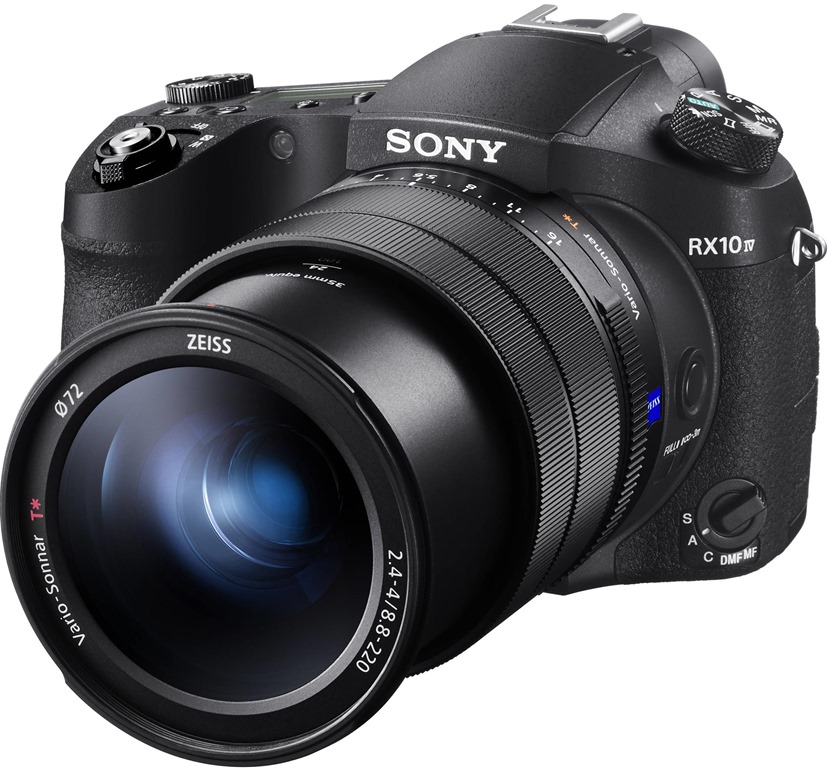
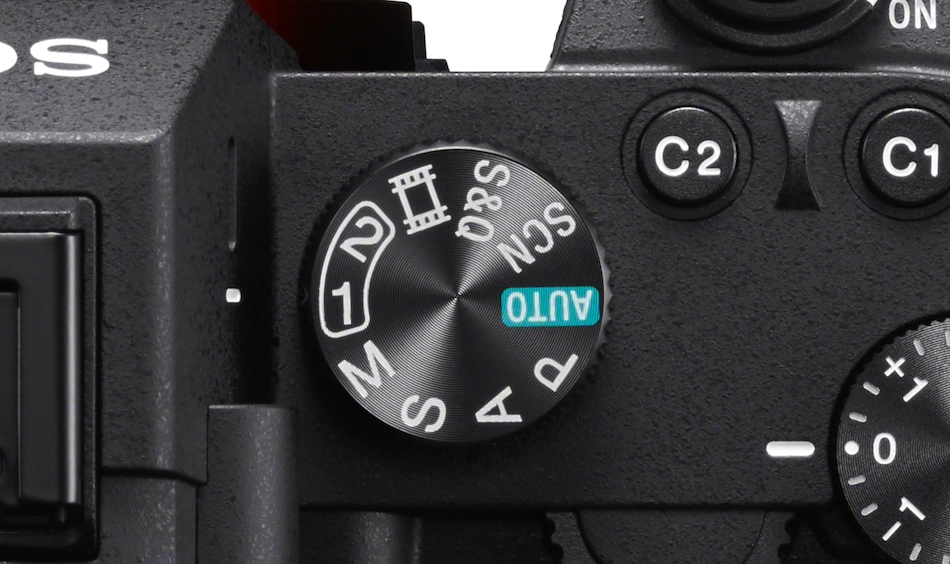
Fast manual shooting depends on your hands as much as your understanding. Learn which dial changes shutter speed, which control changes aperture, and how to access ISO without taking your eye away from the viewfinder.
Practice at home with the camera off, then on. Move through your common settings by feel. Notice the dial direction for brighter and darker exposure. Do short drills: set a wide aperture, switch to a fast shutter speed, then raise ISO without looking at the controls.
At first, this feels awkward. After repeated practice, you will spend less time staring at buttons and more time watching expressions, light, and timing.
When Manual Mode Isn’t the Right Choice
Manual mode is powerful, but it is not a test of seriousness. If light changes quickly, aperture priority or shutter priority can be the smarter tool.
For example, during a walk through alternating sun and shade, aperture priority can hold your chosen depth of field while the camera adjusts shutter speed. For fast action under changing clouds, shutter priority can protect the motion-freezing speed you need. Auto ISO can also be useful in manual exposure when you want to lock aperture and shutter speed but let the camera respond to shifting brightness.
Experienced photographers often mix modes during the same job. Use manual mode when consistency and full control matter most. Use a priority mode when changing light would otherwise pull your attention away from the moment.
The real goal is not to prove that you can operate every control manually. It is to make camera settings feel so familiar that exposure becomes a deliberate choice, not a guessing game. Pick one everyday subject this week, practice the workflow until it feels automatic, and see how much more attention you can give to the photograph itself.