Copy Edit and Stream Photos and Videos Anywhere
Your best photos should not be trapped on the laptop where you edited them. The same goes for video clips sitting on a desktop drive while you are traveling, visiting family, or trying to show a client a recent shoot.
A good photo library setup lets you do three useful things without turning into a full-time IT manager: copy edits between images, keep originals safely stored, and stream photos and videos to the screen in front of you.
That sounds simple, but the details matter. A copied edit can save an hour after a portrait session. A well-organized library can make a 20,000-image archive feel manageable. And reliable streaming means you can show a wedding highlight film on a TV without passing around a tiny phone.
Here is how to build a practical workflow that works whether you use a phone, tablet, laptop, desktop computer, smart TV, or a mix of all of them.
Start with a library you can actually find things in
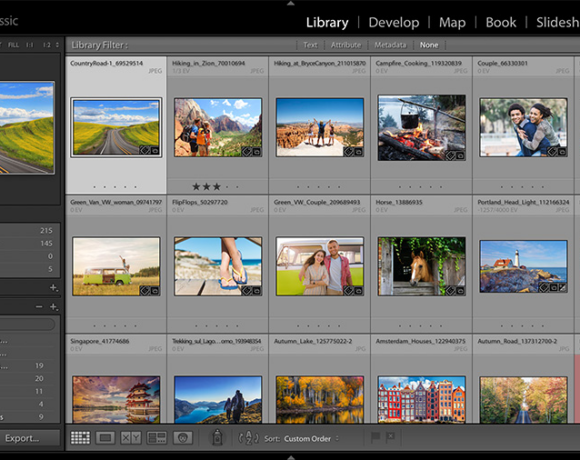
Before thinking about streaming, make sure your photo library has enough structure to support it. You do not need an elaborate folder system with dozens of nested categories. You do need consistent names, dates, and albums.
A straightforward approach is to organize original files by date and event. For example:
- 2026-04-18_Smith-Family-Portraits
- 2026-05-02_Coastal-Road-Trip
- 2026-06-14_Emma-Graduation
Inside a photo application, create albums for the collections you want to revisit or share. An album is usually better than relying on folders alone because one image can appear in several albums without being duplicated.
A photograph from a trip to Lisbon, for instance, might live in a “2026 Portugal” album, a “Best Street Photos” album, and a “Portfolio Candidates” album. You are not making three copies of the image. You are simply giving yourself three ways to find it.
Use ratings and flags while the shoot is still fresh
Sorting later is harder than sorting now. After importing a shoot, make a fast first pass and mark obvious rejects. Then use star ratings, flags, color labels, or favorites for the images worth editing.
A simple system works well:
- Rejected: missed focus, accidental frames, duplicate expressions, test shots.
- One or two stars: usable images that may be useful later.
- Three stars: solid keepers.
- Four stars: images ready for a careful edit or client selection.
- Five stars: portfolio, print, or final delivery candidates.
The exact labels do not matter. Consistency does. If you always use five stars to mean “final,” you can pull together a slideshow in minutes rather than browsing every image from a shoot.
Copy edits when the light and scene are consistent
Copying edits is one of the quickest ways to speed up photo editing. It is especially useful for batches shot under similar conditions: family portraits in one location, a series of landscapes taken around sunset, or product photos made with the same lighting setup.
Most serious photo editors offer a version of this feature. It may be called Copy Settings, Sync Settings, Paste Adjustments, or Copy and Apply Edits. The name changes, but the idea is the same: edit one image, then transfer selected adjustments to related images.
What is safe to copy?
Global adjustments usually transfer well. These include:
- White balance
- Exposure and contrast
- Highlights, shadows, whites, and blacks
- Color profile or film simulation
- Vibrance and saturation
- Lens corrections
- Noise reduction and sharpening
- Crop aspect ratio, when all images need the same output format
Local adjustments need more caution. A mask placed over a person’s face in one frame probably will not line up in the next frame if the person moved. The same applies to healing tools, cloned areas, gradients, and selective dodging or burning.
A practical batch-editing example
Imagine you photographed a friend’s outdoor birthday party from 4 p.m. to 5 p.m. The sun was behind thin clouds, so your exposure and color stayed fairly steady. Pick one representative image: a frame with natural skin tones, a balanced background, and no unusual lighting.
- Edit that image until it feels right.
- Copy the basic adjustments, including white balance, tone, lens correction, and color treatment.
- Select the neighboring images from the same lighting sequence.
- Paste or synchronize those settings.
- Review every image quickly, correcting exposure where the subject moved into shade or sunlight.
- Apply crops, masks, and retouching only to the final picks.
Do not copy an edit blindly across an entire day. A ceremony indoors, portraits near a window, and a reception under colored lights need different treatment. Split the event into lighting groups first. Your results will look more natural, and you will spend less time repairing a bad batch sync.
Keep edits separate from originals whenever possible
Non-destructive editing is one of the most useful habits in digital photography. It means the application saves instructions for your edit rather than permanently altering the original file.
When you lower highlights, crop an image, or create a black-and-white version, the original RAW or JPEG file remains available. You can return to it later, create another version, or export a different size without losing the source image.
This is particularly helpful when a photo has several destinations. You may want:
- A full-resolution file for printing
- A cropped vertical version for social media
- A smaller JPEG for email
- A black-and-white version for a personal project
Instead of keeping four separate master files with confusing names such as IMG_4821_final_final2.jpg, keep one original and create versions or exports as needed.
Export for the screen you are using
Streaming does not always require full-resolution originals. In fact, attempting to play huge files over a weak connection can create long load times and stuttering video.
For casual viewing on a phone, tablet, or television, a high-quality JPEG is often plenty. For video, choose a format your target device supports reliably, commonly MP4 with H.264 or H.265 compression. Compatibility varies by device and app, so test an important presentation before the day you need it.
Keep your originals, but create smaller viewing copies when speed matters. A 4K video may look excellent on a large television, while a 1080p version can be the more dependable choice for hotel Wi-Fi or mobile data.
Choose the right way to stream photos and videos
“Anywhere” does not necessarily mean one single method. The best option depends on where your files are stored, how fast your connection is, and whether you are sharing privately or presenting to a group.
Streaming from a cloud photo library
Cloud-based photo libraries are convenient because they make selected albums available across your signed-in devices. You can edit an image on a computer, pick it up on a tablet, and show it from your phone later.
For this approach to work well, check three things:
- Upload status: confirm the original or viewing-quality file has finished uploading before you leave home.
- Storage limits: know how much space your plan includes, especially if you shoot a lot of high-resolution video.
- Offline access: download important albums to your device before flights, remote trips, or unreliable venues.
A cloud library is excellent for favorites, recent shoots, portfolios, and family albums. It may be less practical for a multi-terabyte archive unless you have the storage plan and upload speed to support it.
Streaming from your own storage
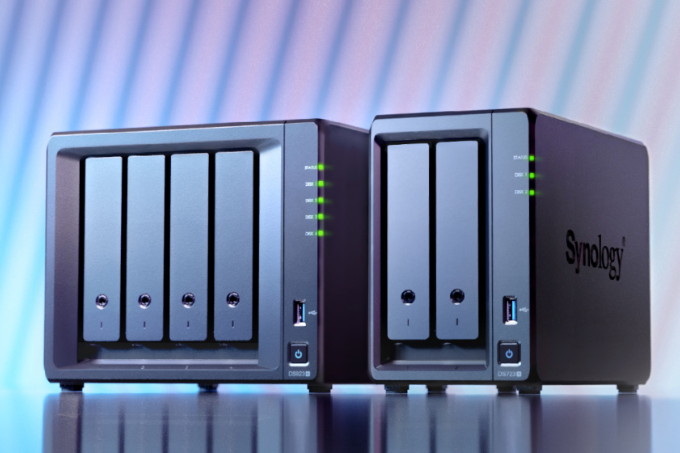
If you keep a large archive at home, network-attached storage or a desktop computer can act as your private media library. This gives you more control over your files and can be cost-effective over time, but it needs a little setup.
For reliable remote viewing, focus on the basics:
- Use strong, unique account passwords.
- Turn on two-factor authentication where available.
- Keep the storage software and router updated.
- Back up the archive separately; streaming access is not a backup plan.
- Test remote playback using mobile data, not only your home Wi-Fi.
Your home upload speed is often the limiting factor. Fast download speed helps you watch content at home, but remote streaming depends heavily on how quickly your home connection can send data outward. If video buffers when you are away, create a lower-resolution copy for streaming rather than assuming the app is the problem.
Streaming to a television or projector
For sharing with a room full of people, a television is more enjoyable than passing around a phone. Most modern setups support a few practical routes:
- Wireless casting: send media from a phone or computer to a compatible TV or streaming device.
- Screen mirroring: useful for showing an editing session, map, or slideshow application.
- HDMI cable: often the most stable choice for client meetings, talks, and important events.
- USB drive: handy when internet access is poor and the TV supports your file formats.
For an important presentation, bring an HDMI adapter and cable even if you plan to cast wirelessly. Wireless sharing is convenient until a guest network blocks device discovery or a projector refuses to cooperate five minutes before you start.
Make sharing intentional, not accidental
Streaming and sharing are not quite the same thing. Streaming lets people view media; sharing links or albums may allow downloading, commenting, or adding images. Decide what you want before sending anything.
For client galleries, consider using a dedicated album with only finished exports. Do not share your entire working library, including near-duplicates, unedited RAW files, or personal images from the same device.
Before sharing, check:
- Who can access the album
- Whether viewers can download files
- Whether a public link can be forwarded
- Whether the link expires
- Whether location metadata should be removed
Location data deserves special attention. A landscape photo may benefit from a location tag. A photo of your home, school, or a child’s usual route may not. Many export tools let you strip GPS information before sharing.
Build a small “show anywhere” collection
You do not need your entire archive available on every device. Create a compact album specifically for sharing: perhaps 50 to 150 favorite photos, a few short video clips, and one polished slideshow.
Update it every few months. Include images that represent the kind of work you want to talk about, whether that is travel photography, family storytelling, wildlife, portraits, or behind-the-scenes video.
This collection becomes useful in unexpected moments: a potential client asks what you shoot, a relative wants to see your latest trip, or you are waiting at an airport with a tablet and time to spare.
The real advantage is not merely having photos everywhere. It is being able to find the right photo, with the right edit, in a format that plays smoothly on the device at hand. Set up that workflow once, keep it simple, and your archive becomes something you can enjoy rather than a hard drive you mean to organize someday. What would be in your first “show anywhere” album? Put one together this week, and share your favorite approach with the Fotomania community.