The Ultimate Guide to Aperture
Aperture is one of the first camera settings photographers learn, and one of the easiest to misunderstand. It affects exposure, depth of field, background blur, lens sharpness, and even the feel of an image. Get comfortable with it, and you stop relying on luck when a portrait background looks messy or a landscape comes out soft from front to back.
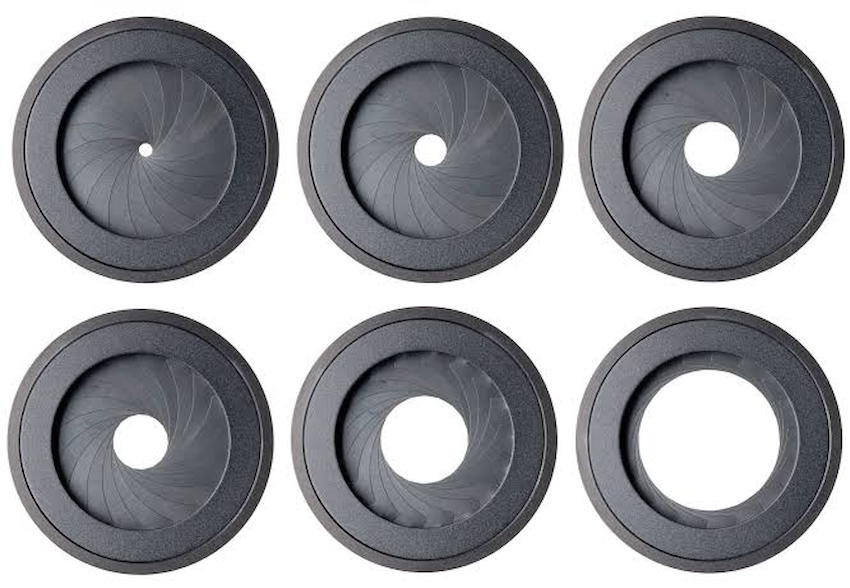
Think of aperture as the adjustable opening inside your lens. Like the pupil of an eye, it can open wide to let in more light or close down to let in less. The size of that opening is shown as an f-number, such as f/1.8, f/4, f/8, or f/16.
The slightly confusing part: smaller f-numbers mean wider openings. Once that clicks, aperture becomes far less intimidating.
What aperture actually does
Aperture controls two important parts of a photograph:
- Exposure: how much light reaches the camera sensor.
- Depth of field: how much of the scene appears acceptably sharp from foreground to background.
A wide aperture, such as f/1.8 or f/2.8, lets in a lot of light. It is useful in dim rooms, at dusk, or whenever you need a faster shutter speed. It also creates a shallow depth of field, where your subject may be sharp while the background falls pleasantly out of focus.
A narrow aperture, such as f/11 or f/16, lets in less light. It generally increases depth of field, making more of a scene look sharp. That is why landscape photographers often use smaller apertures when they want both a nearby rock and distant mountains in focus.
Understanding f-stops without the headache
Common full-stop aperture values are f/1.4, f/2, f/2.8, f/4, f/5.6, f/8, f/11, f/16, and f/22. Moving one full stop changes the amount of light by half or double.
For example, moving from f/4 to f/5.6 halves the light entering the lens. If your exposure was correct at 1/250 second and f/4, you could use 1/125 second at f/5.6 to maintain a similar exposure. You have lost one stop of light through the aperture, so you compensate by doubling the exposure time.
This matters because aperture never works alone. It is part of the exposure triangle alongside shutter speed and ISO.
- Open the aperture from f/5.6 to f/2.8: more light enters the lens.
- Use a faster shutter speed to avoid overexposure.
- Or lower your ISO for a cleaner file.
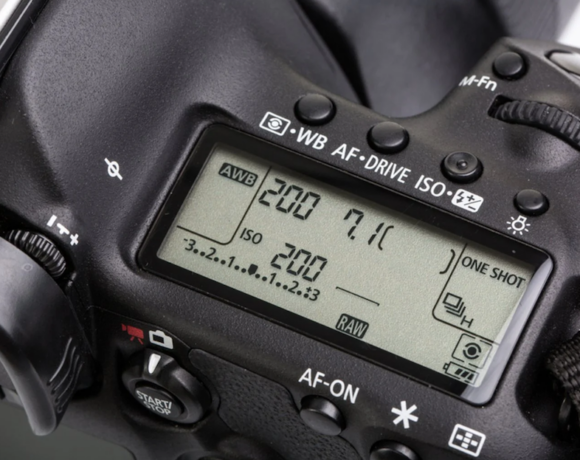
Most cameras offer one-third-stop adjustments between the familiar numbers. You may see values such as f/3.2, f/4.5, or f/7.1. You do not need to memorize every step. Just know that moving toward a lower number opens the lens, while moving toward a higher number closes it.
How aperture changes background blur
The blurred area behind or in front of your subject is often called bokeh. Strictly speaking, bokeh describes the quality or character of the blur, not simply the amount of it. Still, aperture is one of the main tools for creating it.
If you photograph a person at f/1.8 with a suitable lens, their eyes can be sharp while trees, buildings, or a busy street behind them become soft. This separation helps direct attention to the face.
But aperture is not the only factor. Background blur also depends on:
- Subject distance: Get closer to your subject for a shallower depth of field.
- Background distance: Move your subject farther from the background to make that background blurrier.
- Focal length: Longer lenses, such as 85mm or 200mm, often make background blur more obvious than wider lenses at similar framing.
- Sensor size: Larger sensors can produce shallower depth of field when framing and exposure are matched.
Here is a practical portrait example. Put your subject two meters from a wall, then stand fairly close and shoot at f/2.8. Next, move the subject just 30 centimeters from that same wall. Even at f/2.8, the wall will look more defined because it is closer to the plane of focus. Positioning often matters as much as the f-stop.
Choosing aperture for common photo subjects
Portraits
For a head-and-shoulders portrait, try f/1.8 to f/2.8 if your lens allows it. Focus carefully on the nearest eye. At very wide apertures, especially with close-up portraits, the depth of field can be so thin that one eye is sharp and the other is not.
For couples, families, or small groups, stop down. f/4 to f/5.6 is often safer because people will not all stand on exactly the same focus plane.
Landscapes
f/8 is a reliable starting point for many landscape scenes. It usually gives good depth of field and strong lens performance without pushing too far into diffraction. If you need more foreground-to-background sharpness, try f/11, then check the result at high magnification.
Do not automatically use f/22. A very narrow aperture can make more of the scene fall within depth of field, but it can also reduce fine detail due to diffraction.
Street photography and travel
f/5.6 or f/8 works well when you want enough depth of field to catch unpredictable moments. On a sunny street, f/8 may also give you a fast enough shutter speed to freeze walking subjects.
If light drops or you want a cleaner separation between a subject and the surroundings, open to f/2.8 or f/4.
Food and product photography
For a single detail, such as the front edge of a dessert or a watch face, f/2.8 to f/4 can look great. For a flat-lay image where several objects need to be clear, f/5.6 to f/8 is usually more practical.
With close-up work, depth of field becomes extremely shallow. A ring photographed at f/2.8 may have only a tiny portion in focus. Stop down and consider using a tripod if the shutter speed gets slow.
Wildlife and sports
A wide aperture is often useful here because it supports the fast shutter speeds needed for movement. If you are photographing a bird in flight, f/4 or f/5.6 may be a sensible compromise between light, subject sharpness, and background separation. The exact choice depends on the lens and how much of the animal needs to be sharp.
The sharpness trade-off: aperture and diffraction
Many lenses are not at their sharpest when used wide open. At f/1.4 or f/1.8, you may see softer corners, reduced contrast, vignetting, or less forgiving focus accuracy. That does not mean those settings are bad. They are often exactly right for portraits or low-light work.
Stopping down a little, perhaps from f/1.8 to f/2.8 or f/4, often improves sharpness across more of the frame. Many lenses perform very well around f/5.6 to f/8.
Then there is diffraction. As the aperture becomes very small, light spreads slightly as it passes through the opening. This can soften fine detail. The effect varies by camera and lens, but it is a useful reason not to treat f/16 or f/22 as default settings.
Use the aperture your image needs. A slightly softer f/16 photograph with the entire scene in focus is better than a technically crisp f/5.6 image with the foreground you wanted left blurry.
How to set aperture on your camera
The simplest way to practice is with Aperture Priority mode. It is marked as A on many cameras and Av on Canon cameras. You select the aperture, and the camera selects a shutter speed to match the meter reading.
- Set your camera to A or Av mode.
- Choose a starting aperture based on your subject: f/2.8 for a portrait, f/8 for a landscape, or f/5.6 for everyday shooting.
- Watch the shutter speed your camera selects.
- If the shutter speed is too slow for handheld shooting, raise ISO or open the aperture.
- Take a test image and inspect the focus point, not just the overall brightness.
For handheld photos, a useful rule is to keep shutter speed at least as fast as the reciprocal of your focal length. At 50mm, aim for around 1/50 second or faster; at 200mm, around 1/200 second or faster. Modern image stabilization can help with camera shake, but it cannot freeze a moving child, pet, or cyclist.
A simple aperture practice exercise
You can learn more in ten minutes of shooting than by reading another list of f-stops. Find a subject with some space behind it: a mug on a table, a plant, or a friend standing several steps from a wall.
- Frame the subject and keep your position fixed.
- Take a photo at your lens’s widest aperture.
- Take the same photo at f/2.8, f/4, f/5.6, f/8, and f/11 where available.
- Keep exposure similar by using Aperture Priority mode or adjusting shutter speed in Manual mode.
- Compare the background, the focused area, and the shutter speed in each image.
You will quickly see the trade-off: closing the aperture gives you more focus depth, but demands more light or a slower shutter speed. That is aperture in the real world.
Common aperture mistakes to avoid
- Using the widest aperture for every portrait: f/1.4 can be beautiful, but it can also leave eyelashes sharp and eyes soft if focus is slightly off.
- Using f/22 for every landscape: More depth of field is not always worth the diffraction loss.
- Ignoring shutter speed: Aperture Priority can choose a shutter speed too slow for a moving subject.
- Assuming a fast lens guarantees good blur: Subject and background placement are just as important.
- Forgetting to check the edges of a group: A wide aperture can leave people at the sides or back of a group soft.
Aperture is not a setting to memorize; it is a creative decision. Every f-stop asks a useful question: do you want to show the world around your subject, or let it fade away? Try answering that question before you press the shutter, then tell us which aperture you reach for most often and why.