The Ultimate Guide to Auto Exposure Bracketing
Auto Exposure Bracketing, usually shortened to AEB, is one of those camera features that sounds more technical than it really is. At its simplest, it tells your camera to take several versions of the same scene at different brightness levels.
You get one image at the meter’s suggested exposure, plus darker and lighter frames. That extra safety margin can rescue a high-contrast landscape, preserve a bright window in an interior, or give you cleaner files for HDR processing later.
The best part: once you set it up, AEB is quick. You do not need to guess wildly at exposure or spend ages changing settings between shots. You just need to know when to use it, how wide to set the bracket, and how to keep the sequence usable.
What Auto Exposure Bracketing Does
AEB captures a series of exposures around your base exposure. A typical three-shot bracket might look like this:
- -2 EV: a darker frame that protects bright highlights
- 0 EV: the camera’s normal metered exposure
- +2 EV: a brighter frame that opens shadow detail
EV means exposure value, or “stop” in practical photography language. One stop of exposure doubles or halves the amount of light reaching the sensor.
If the normal exposure is 1/125 second, a one-stop darker exposure could be 1/250 second. A one-stop brighter frame could be 1/60 second. Depending on your shooting mode, the camera may instead change aperture or ISO, which matters a lot for the final result.
Most cameras offer three, five, seven, or more bracketed shots. Many allow you to choose the spacing between frames, commonly 1/3, 2/3, 1, 2, or 3 EV.
When Exposure Bracketing Is Worth Using
You do not need to bracket every photograph. In soft, even light, a single well-exposed RAW file is often all you need. AEB earns its place when the scene contains a brightness range your sensor cannot comfortably record in one shot.
Landscapes with bright skies
A sunrise scene is a classic example. The sky may be several stops brighter than the land below it. Expose for the ground and the clouds can blow out. Expose for the sky and the foreground becomes very dark.
A three- or five-frame bracket lets you preserve both. You can blend the images manually, process them as an HDR image, or simply choose the frame with the best balance.
Interiors with windows
Real-estate, architecture, and travel photographers run into this constantly. A room may look pleasant to your eyes, yet the windows are glaring rectangles in a photo.
Bracket the scene with enough darker exposures to retain what is outside the windows. Later, blend that detail into the correctly exposed room.
Backlit portraits
If a subject is standing in front of a bright sunset, a window, or a pale beach, bracketing can provide options. One frame may preserve the sky, another may give you a clean exposure on the face.
For people who are moving, though, be careful. Blending multiple frames becomes difficult when hair, hands, or clothing shift between shots.
Scenes you cannot repeat
Travel moments, changing weather, ceremonies, and fleeting wildlife behavior are all situations where a bracket can be reassuring. If your camera can fire a fast burst, AEB gives you several exposure choices without interrupting the moment too much.
Choose the Right Shooting Mode
How your camera creates the bracket depends on the exposure mode. This is where many photographers get surprised.
Aperture Priority: useful, with one caveat
In Aperture Priority, you choose the aperture and the camera normally changes shutter speed to make the bracket. This keeps depth of field consistent across the sequence, which is ideal for landscapes and interiors.
The catch is camera shake. If the brighter frames require a slow shutter speed, handheld images may blur. Use a tripod when possible.
Shutter Priority: usually not the first choice
In Shutter Priority, the camera may change aperture for each bracketed frame. That means depth of field can shift from one image to another. It is not ideal for image blending, particularly if you have foreground detail close to the lens.
It can still work for fast action when shutter speed is your non-negotiable setting, but check whether the aperture reaches its limit.
Manual mode: the most controlled option
Many modern cameras can use AEB in Manual exposure while automatically changing the shutter speed. This is often the cleanest approach for tripod-based work: you lock aperture for consistent depth of field, lock ISO for consistent image quality, and let shutter speed vary.
Camera behavior differs by brand and model, so test your setup before an important shoot. Some cameras apply the bracket through shutter speed; others may involve ISO if Auto ISO is active.
Keep Auto ISO under control
For serious brackets, especially brackets intended for HDR or blending, set a fixed ISO whenever possible. Auto ISO can cause the camera to alter sensitivity rather than shutter speed, creating uneven noise and less predictable files.
Start at your camera’s base ISO, often ISO 100 or ISO 64, unless the light or shutter speed demands otherwise.
How to Set Up AEB
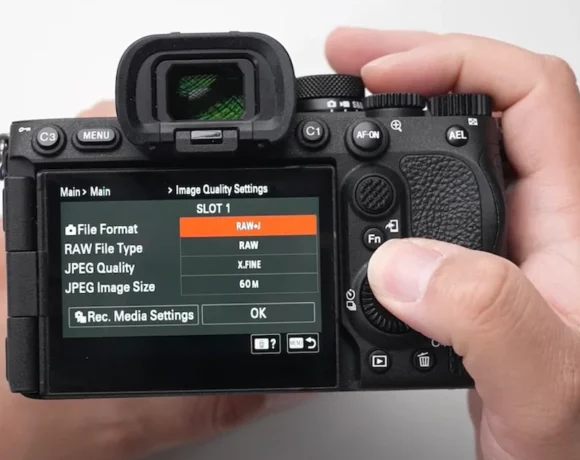
The exact menu names vary, but the process is nearly universal. Look for Exposure Bracketing, AEB, or a drive-mode option with stacked exposure bars.
- Set your composition and meter the scene.
- Choose a shooting mode. Aperture Priority or Manual mode is usually best.
- Set a fixed ISO.
- Open the AEB or bracketing menu.
- Select the number of frames: three is a practical starting point.
- Set the exposure interval, such as ±1 EV or ±2 EV.
- Choose continuous drive mode if your camera requires it.
- Use a tripod, remote release, or self-timer if the scene is static.
- Take the sequence and review the histogram, not only the preview image.
Some cameras fire the whole bracket with one press of the shutter button. Others require you to hold the button down or press it once for each image. Learn which behavior your camera uses before you are standing in cold wind waiting for the light to peak.
How Many Frames and Stops Should You Use?
There is no universal setting, but these starting points cover most situations.
- 3 frames at ±1 EV: mild contrast, handheld safety bracket, portraits in uneven light
- 3 frames at ±2 EV: a strong general-purpose landscape setting
- 5 frames at 1 EV intervals: interiors, sunsets, and scenes with important shadow detail
- 5 to 7 frames at 2 EV intervals: very high-contrast scenes, especially static architecture or dramatic sunrise light
More frames are not automatically better. They take longer to shoot, occupy more card space, and increase the risk of movement between exposures. Bracket only as widely as the scene requires.
A useful habit is to take one test shot and inspect the histogram. If highlights are clipped in the important part of the scene, add darker frames. If shadow areas are jammed against the left edge and you need detail there, add brighter frames.
Use the Histogram to Check Your Bracket
Your camera’s rear screen can be misleading. Brightness changes with the display setting and the ambient light around you. The histogram gives a more reliable view of what the file contains.
For a landscape bracket, you generally want:
- At least one dark frame with important highlights protected
- At least one bright frame with usable shadow detail
- No need for every frame to look good on its own
The darkest exposure may look almost unusable on the back of the camera. That is fine if it contains texture in the clouds, a bright sign, or a sunlit building that would otherwise clip.
Turn on highlight warning or “blinkies” if your camera has it. A few blinking specular reflections are usually harmless. Large blinking areas in clouds, wedding dresses, white walls, or bright windows may be a warning that you need another darker frame.
Keeping Bracketed Images Sharp and Aligned
Bracketing works best with a scene that stays still. A sturdy tripod is the obvious solution, but good technique helps even when you shoot handheld.
- Use continuous shooting so the frames are captured quickly.
- Keep your stance stable and avoid recomposing during the sequence.
- Turn off image stabilization only if your lens or camera manual recommends it on a tripod.
- Use electronic first-curtain shutter or electronic shutter when appropriate to reduce vibration.
- Watch for moving leaves, waves, people, cars, and clouds when planning an HDR blend.
Windy trees and moving water do not mean you cannot bracket. They simply mean you may need software with deghosting controls, or you may choose to blend only selected areas rather than merging the entire sequence.
What to Do With the Bracketed Files
Once you are back at your computer, you have three practical options.
Pick the best single exposure
Sometimes the normal frame is fine, or one of the bracketed alternatives has better highlight protection. This is the fastest route and often the most natural-looking one.
Blend exposures manually
Manual blending gives you the most control. In Photoshop or similar software, place the exposures in layers, align them if needed, and use masks to reveal the best sky, foreground, windows, or highlights from each frame.
This approach is excellent when you want a realistic final image without the exaggerated look associated with heavy HDR processing.
Merge to HDR
Lightroom, Adobe Camera Raw, Capture One, and several dedicated HDR applications can merge bracketed RAW files. Use deghosting if something moved between frames, then edit the merged file with restraint.
A good HDR image should usually look like a convincing photograph of the scene, not a special effect. Watch for halos around trees and buildings, gray-looking blacks, crunchy micro-contrast, and over-saturated colors.
Common AEB Mistakes to Avoid
Forgetting to turn AEB off is probably the classic mistake. You finish a sunset bracket, then wonder why every casual photo for the next hour comes in sets of three. Make it part of your end-of-shoot routine.
Bracketing moving subjects without a plan can create a pile of unusable frames. If your main subject is moving, prioritize a clean single exposure. Use bracketing only if your camera’s burst rate is fast enough and you are prepared to choose one frame rather than merge them.
Using a tiny bracket for an extreme scene is another common problem. A ±1 EV bracket may not be enough for a dark room and a sunlit window. Check the histogram and widen the range when necessary.
Letting aperture change can make blending awkward because depth of field shifts. For static scenes, hold aperture and ISO steady, then bracket with shutter speed.
Assuming RAW fixes everything is risky. RAW files have impressive latitude, but clipped highlight detail is often gone for good. A darker bracket is still the safer choice when highlights matter.
A Simple Field Recipe
For a typical landscape at sunrise or sunset, try this:
- Mount the camera on a tripod.
- Set Manual mode, base ISO, and an aperture around f/8 to f/11 if the scene calls for broad depth of field.
- Focus carefully, then avoid changing focus during the sequence.
- Set a three-frame bracket at ±2 EV.
- Fire the sequence with a two-second timer or remote release.
- Review the darkest frame for highlight detail in the sky.
- Add more range only if the shadows or highlights still need it.
This setup is not magic, but it is dependable. After a few sessions, changing the number of frames and EV spacing will feel as routine as setting white balance.
AEB is not about making every image into HDR. It is about making deliberate exposure decisions while the scene is still in front of you. The real skill is knowing which details matter enough to protect—and which can safely fall into shadow or light. Try a three-shot ±2 EV bracket on your next high-contrast scene, then compare the files at home. You may find that the frame you almost did not take is the one that makes the photograph work.