The Ultimate Guide to Drive Modes
Drive modes control what happens after you press the shutter button. They decide whether your camera takes one frame, fires a burst, waits for a timer, stays quiet, or captures a sequence for a specific purpose.
They are easy to overlook because they often sit behind a small button or menu icon. But once you understand them, drive modes become one of the fastest ways to improve your timing, sharpness, and hit rate.
If you have ever missed a child blowing out birthday candles, struggled to photograph yourself on a tripod, or ended up with blurry images from pressing the shutter too hard, the right drive mode can help.
What are drive modes?
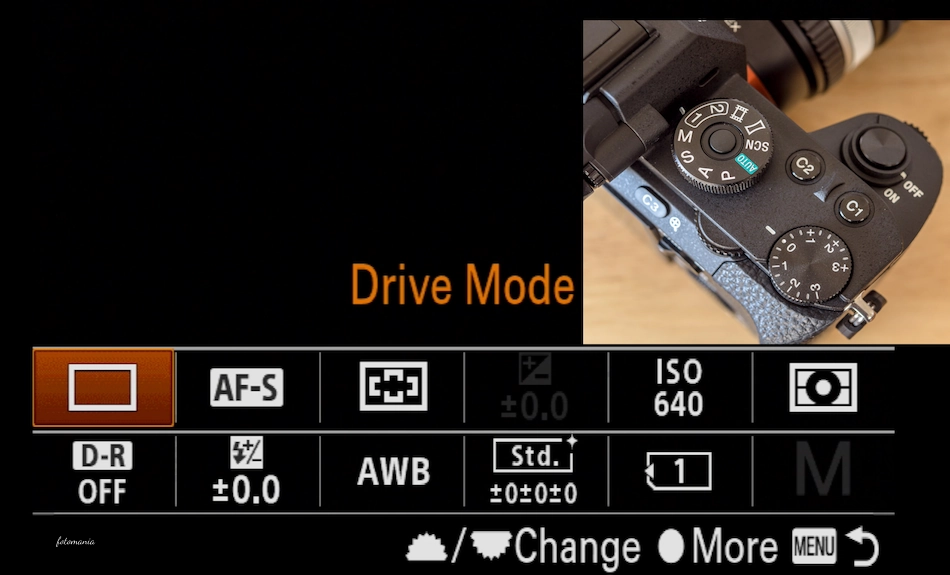
A drive mode tells the camera how it should capture images when you press and hold the shutter release. On many cameras, the setting is marked with an icon showing stacked rectangles, a clock, or several small frames.
The exact options vary by brand and model, but most cameras include versions of these:
- Single shooting
- Continuous or burst shooting
- Self-timer
- Quiet or silent shooting
- Bracketing
- Interval or time-lapse shooting
Drive mode is not the same thing as autofocus mode. Autofocus mode controls how the camera focuses; drive mode controls how it records frames. The two work together, especially when photographing action.
Single shooting: the default for deliberate photography
Single shooting captures one image every time you press the shutter button. It is the calm, controlled option, and it is ideal for subjects that are not changing quickly.
Use it for:
- Landscapes
- Architecture
- Still-life setups
- Street scenes when you are waiting for one precise moment
- Portraits where you want to direct the subject between frames
Single shooting slows you down in a useful way. You are more likely to check the edges of the frame, watch the background, and wait for the right expression rather than firing 40 nearly identical images.
For example, when photographing a person by a window, take one shot, check whether their eyes are sharp, then adjust your position or ask them to turn slightly. A burst will not fix poor light, an awkward pose, or a distracting lamp growing out of someone’s head.
Continuous shooting: when the moment will not wait
Continuous shooting, often called burst mode, takes a series of images while you hold down the shutter button. Cameras may offer low, medium, and high-speed options. The fastest setting can range from a few frames per second to far more on modern mirrorless bodies.
Use continuous shooting when the subject’s expression, position, or gesture changes quickly:
- Sports and wildlife
- Children and pets
- Weddings, especially processions and confetti exits
- Birds taking off or landing
- Dance, skateboarding, and other movement-heavy scenes
Choose the slowest burst rate that does the job
Maximum frame rate sounds attractive, but it creates more files, fills the camera buffer faster, and makes editing take longer. A moderate burst is often enough for portraits and casual action.
Imagine photographing a runner approaching the finish line. Start tracking them before they reach your chosen background. Then fire a short burst as they hit the spot where the light, pose, and composition come together. You do not need to hold the shutter from the moment they appear at the far end of the course.
This approach is often called burst discipline: shoot short, intentional sequences instead of spraying frames continuously.
Pair burst mode with the right autofocus setting
For moving subjects, continuous drive mode works best with continuous autofocus—often called AF-C, AI Servo, or a similar name. This lets the camera keep updating focus as the subject moves.
Also consider your shutter speed. A camera shooting 20 frames per second can still produce 20 blurry images if the shutter is too slow. For a running dog, try starting around 1/1000 second. For slower walking movement, 1/250 second may be enough, depending on your focal length and the look you want.
Self-timer: not just for group photos
The self-timer delays the shutter after you press it. The familiar 10-second setting is useful for group portraits and self-portraits, but shorter delays are just as valuable.
A two-second timer is one of the simplest tools for sharper tripod-based photographs. Even a gentle press of the shutter can introduce a tiny vibration, particularly when using a longer lens or photographing at slow shutter speeds.
Try a two-second timer for:
- Landscapes at sunrise or sunset
- Night photography
- Macro images
- Long-exposure water or traffic scenes
- Product photography on a tripod
For self-portraits, a 10-second timer gives you time to get into position. Better still, if your camera supports it, use a remote release or a phone app. That lets you review your pose and trigger the camera without sprinting back and forth.
Use timer bursts for better self-portraits
Many cameras offer a timer that takes several images after the delay. Turn this on for group photos or self-portraits. People blink, look away, or relax too early after the first shutter click. A sequence of three to ten frames gives everyone a better chance of looking natural.
Quiet and silent shooting: useful, but not invisible
Some cameras offer a quiet mode that reduces shutter noise. Mirrorless cameras may also offer silent shooting, which uses an electronic shutter and can be nearly noiseless.
These modes are helpful in places where a mechanical shutter would be distracting:
- Wedding ceremonies
- Classical concerts and theatre rehearsals, where photography is allowed
- Documentary work in quiet indoor spaces
- Wildlife situations where sound may disturb the subject
There are trade-offs. Electronic shutters can sometimes distort fast-moving subjects or produce bent-looking vertical lines when you pan quickly. This is known as rolling shutter. You may also see banding under certain LED or fluorescent lights.
If you are photographing a tennis serve, a spinning propeller, or a fast train passing close by, test silent mode first. If straight lines look slanted or repeated shots show uneven exposure, switch back to the mechanical shutter or try an anti-flicker setting if your camera provides one.
Bracketing: a safety net for difficult light
Bracketing tells the camera to make several frames with different settings. The most common version is exposure bracketing, where the camera takes one normal exposure plus darker and brighter alternatives.
It is useful when a scene has a wide range of brightness, such as a sunset over dark foreground rocks or a bright window inside a dim room.
A typical setup might be three frames at -2, 0, and +2 exposure compensation. You can choose the best file later or blend exposures carefully for a natural-looking result.
Bracketing is most effective when the camera is stable and the scene is not moving much. Put the camera on a tripod for architectural interiors and landscapes. If leaves are blowing hard or people are walking through the frame, blending multiple exposures can become messy.
Other bracketing options
Depending on your camera, you may find:
- Focus bracketing for macro work, where several focus distances can be stacked later
- White balance bracketing, which creates copies with different color temperature settings
- Flash bracketing for testing flash output
Focus bracketing is especially useful when photographing a small object close up. At high magnification, depth of field can be so thin that even f/11 does not keep the whole subject sharp. A sequence focused from front to back can solve that, provided the subject stays still.
Interval shooting and time-lapse
Interval shooting captures one image at a set interval: every five seconds, every minute, or every few minutes. It is the foundation of time-lapse photography.
Use it for scenes that change gradually:
- Clouds moving across a landscape
- A flower opening
- City traffic after dark
- Construction projects
- Changing light during blue hour
Before starting, think through battery life, memory card space, and exposure consistency. For a sunset time-lapse, locking your white balance is usually wiser than Auto White Balance, which can cause color shifts from frame to frame. Manual exposure often produces steadier results too, though changing light may require careful adjustments.
A practical drive mode workflow
Before you start shooting, take five seconds to match the drive mode to the scene.
- Ask whether the subject is moving. If not, start with single shooting.
- Decide whether timing is critical. Use a low or high burst for fast expressions, action, or unpredictable movement.
- Check whether the camera is on a tripod. Use a two-second timer, remote, or app to avoid shake.
- Consider the environment. Use quiet mode where sound matters, but watch for electronic-shutter artifacts.
- Look at the light. Consider bracketing when highlights and shadows exceed what one exposure can handle.
It is also worth building a habit: after photographing action, switch your camera back to single shooting. Otherwise, you may return home with a burst of 25 photos of a coffee cup because you forgot the camera was still in high-speed continuous mode.
Common drive mode mistakes
The biggest mistake is treating burst mode as the answer to every photographic problem. More frames can help, but they also make you less selective in the moment and more tired during editing.
Another common issue is using a self-timer and then forgetting to turn it off. The next candid moment arrives, you press the shutter, and your camera starts counting down while the scene disappears. Check the drive mode icon whenever the camera behaves unexpectedly.
Finally, do not assume the fastest advertised burst rate is always available. Some cameras slow down with certain file formats, autofocus settings, lenses, or shutter types. The buffer can also fill during a long sequence. Spend ten minutes testing your camera before an important shoot, not during it.
Make the camera respond to the scene
Drive modes are simple controls with a big effect on how you work. Single shooting helps you slow down. Continuous shooting gives you options when timing is tight. A timer removes vibration. Bracketing gives difficult light a little less power over your final image.
The best setting is not the one with the highest frame rate; it is the one that supports the photograph you are trying to make. Next time you pick up your camera, check the drive mode before the first frame—and tell us which mode has saved one of your shots.