The Ultimate Guide to ISO
ISO is one of the three controls that shape every photograph, alongside aperture and shutter speed. It is also one of the most misunderstood. Many photographers learn “low ISO equals good, high ISO equals bad,” then spend years avoiding settings their camera can handle perfectly well.
The practical truth is simpler: ISO helps you get the exposure you need when aperture and shutter speed cannot move any further. It comes with trade-offs, but those trade-offs are often better than a blurry, underexposed, or completely missed image.
Here is how ISO works, when to raise it, when to keep it low, and how to make better decisions in the field.
What ISO means in photography
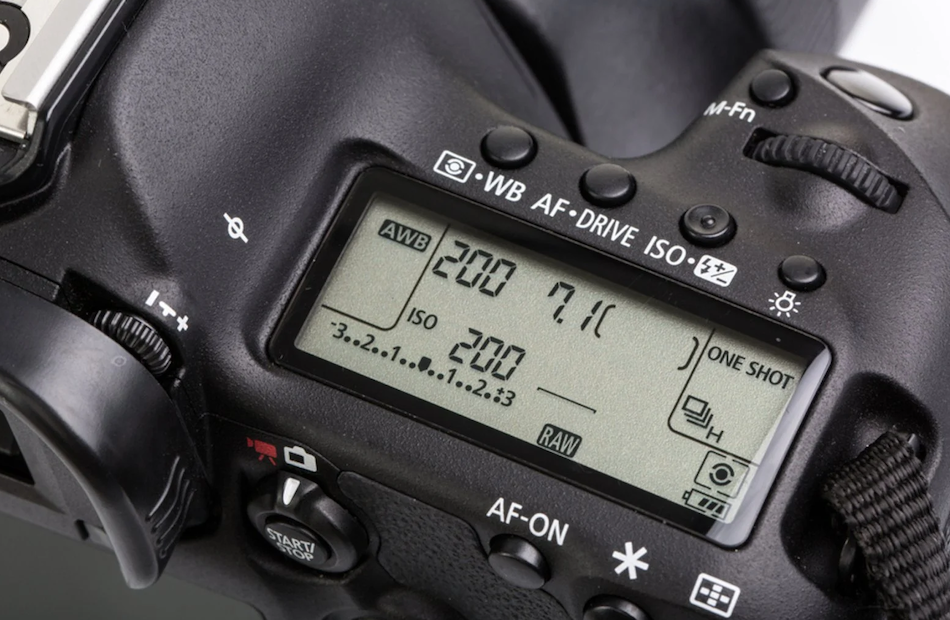
On a digital camera, ISO controls how strongly the camera amplifies the signal captured by the sensor. Raising ISO makes the resulting image appear brighter. Lowering it makes the image appear darker, assuming aperture and shutter speed stay the same.
Common full-stop ISO settings look like this:
- ISO 100
- ISO 200
- ISO 400
- ISO 800
- ISO 1600
- ISO 3200
- ISO 6400
Each full stop doubles the brightness in the final image. For example, ISO 800 is one stop brighter than ISO 400, while ISO 1600 is two stops brighter than ISO 400.
ISO does not create more light. It lets you work with the light already available by amplifying the sensor’s signal. That distinction matters because amplification also makes unwanted imperfections more visible.
ISO and the exposure triangle
ISO works as part of the exposure triangle:
- Aperture controls how much light enters through the lens and affects depth of field.
- Shutter speed controls how long light reaches the sensor and affects motion blur.
- ISO affects image brightness and the amount of visible noise.
When you change one setting, you usually need to adjust another to maintain the same brightness.
Imagine you are photographing a person indoors at f/2.8 and 1/125 sec. Your image is too dark at ISO 400. You have three basic options:
- Open the aperture wider, perhaps from f/2.8 to f/2, if your lens allows it.
- Use a slower shutter speed, such as 1/60 sec, if subject movement and hand shake will not be a problem.
- Raise ISO to 800 or 1600.
If the person is moving, a slower shutter speed may cause blur. If you want the background reasonably sharp, opening the aperture may not suit the shot. Raising ISO is often the right call.
What happens when you raise ISO?
Higher ISO settings make it easier to shoot in dim light or use faster shutter speeds. The downside is usually image noise: the grainy or speckled texture that becomes more obvious in shadows and flat areas of colour.
At higher ISOs, you may also notice:
- Less fine detail
- Reduced dynamic range
- More colour noise, especially in dark areas
- Softer-looking files after noise reduction
- Less flexibility when lifting shadows during editing
How noticeable these effects are depends heavily on your camera, the size of its sensor, how accurately you expose, and where the photo will be viewed. A modern full-frame camera can often produce strong images at ISO 6400. A phone or older compact camera may show visible noise much earlier.
Do not judge an ISO setting from a 100% zoomed-in preview alone. A photo that looks noisy at pixel level may look excellent as a print, social post, or web image.
Start with the lowest practical ISO
Most cameras have a base ISO, often ISO 100 or ISO 200. This is usually where the sensor delivers its best image quality and widest dynamic range.
Use a low ISO when you have enough light or can control the scene:
- Landscape photography from a tripod
- Architecture and interiors with a tripod
- Studio portraits with flash
- Bright outdoor portraits
- Product and food photography
- Long exposures where shutter speed can be several seconds
For example, if you are photographing a coastal landscape at sunrise with a tripod, ISO 100 gives you the cleanest file. You can use f/11 for depth of field and allow the shutter speed to become as slow as necessary.
That approach does not work everywhere. A handheld street photo at dusk is a different problem. Keeping ISO 100 may force a shutter speed so slow that every frame is soft.
When higher ISO is the smarter choice
Raise ISO when it protects the part of the image that matters most: sharpness, timing, or your intended aperture.
When your shutter speed is too slow
Camera shake and subject movement are common reasons for disappointing photos. If your shutter speed is not fast enough, increase ISO before accepting blur.
As a rough starting point for handheld shooting, use a shutter speed at least as fast as the reciprocal of your focal length. With a 50mm lens, aim for around 1/50 sec or faster. With a 200mm lens, aim for around 1/200 sec or faster.
For moving subjects, you need more speed:
- Walking people: around 1/250 sec
- Children playing: around 1/500 sec
- Running dogs or casual sports: around 1/1000 sec
- Fast action or birds in flight: often 1/1600 sec and above
These are starting points, not laws. A dancer’s flowing dress may blur at 1/500 sec in a way you like. A portrait subject holding still may be fine at 1/60 sec. Let the subject decide.
When you need more depth of field
Suppose you are photographing a group of people indoors. Shooting at f/1.8 may make the front row sharp and the back row soft. Stopping down to f/4 or f/5.6 gives you more depth of field, but it also reduces the incoming light.
Instead of dragging the shutter speed down too far, raise ISO. ISO 1600 at f/4 and 1/125 sec may produce a far better group photo than ISO 400 at f/1.8 and 1/125 sec.
When flash is not allowed or would spoil the scene
Concerts, weddings, museums, theatre performances, and candid indoor events often require available-light shooting. High ISO is part of the job.
At a wedding reception, you may be working at f/2.8, 1/200 sec, and ISO 3200 or 6400. That is not a technical failure. It is the setting combination required to keep people sharp in a dim room without turning the moment into a flash-lit snapshot.
Understanding ISO noise in real use
Noise is not caused by ISO alone. Underexposure is a major contributor. A dark ISO 800 image brightened heavily in editing can look worse than a correctly exposed ISO 3200 image.
This is why photographers often say: expose properly in camera whenever possible. Watch your highlights, but do not make the whole frame unnecessarily dark because you are afraid of raising ISO.
There is a useful distinction here:
- High ISO noise comes from working with a weaker light signal and increasing amplification.
- Shadow noise becomes obvious when very dark image data is pushed brighter in post-processing.
A slightly brighter exposure at ISO 3200 may retain cleaner shadows than an ISO 800 file that needs a two-stop exposure boost later. Check how your own camera behaves, because sensor performance differs from model to model.
Native ISO, expanded ISO, and “Lo” settings
Your camera may offer ISO values outside its normal range, such as “Lo 1,” ISO 50, or very high extended settings. These are often called expanded ISO options.
They can be useful, but do not assume they provide the same quality as standard settings.
- A low expanded setting such as ISO 50 may reduce highlight headroom on some cameras.
- Very high expanded settings may create JPEGs that look bright but have heavy noise and limited detail.
- Your camera’s native ISO range is generally the safest place to work when image quality matters.
Check your camera manual for its native range and test a few settings yourself. Photograph the same scene at several ISO values, then compare the files at your usual output size.
How to use Auto ISO without losing control
Auto ISO is one of the most useful camera features once it is configured well. It lets the camera adjust ISO while you control the settings that affect the look of the image.
A practical setup for many situations is:
- Choose aperture priority or manual mode.
- Set the aperture you want for depth of field.
- Choose a minimum shutter speed that will keep the subject sharp.
- Set a maximum ISO you are comfortable using.
- Let the camera adjust ISO as the light changes.
For street photography with a 35mm lens, you might use f/5.6, a minimum shutter speed of 1/250 sec, and Auto ISO limited to ISO 6400. In bright sun, the camera may choose ISO 100. When you step into shade, it can raise ISO while protecting your shutter speed.
For birds, you might use manual exposure at 1/2000 sec and f/5.6 with Auto ISO. This keeps motion-stopping shutter speed and depth of field consistent while the ISO shifts as the bird moves from sky to trees.
A practical ISO decision process
When the light changes, avoid spinning the ISO dial at random. Work through this quick sequence:
- Set your shutter speed first if motion matters.
- Set your aperture based on depth of field and lens performance.
- Raise ISO only as much as needed for a correct exposure.
- Check the histogram and highlights, especially in contrasty scenes.
- Review sharpness at useful magnification, not only brightness on the rear screen.
For a night street scene, you may decide that 1/125 sec is your minimum for people walking, and f/2 is the aperture that gives the look you want. If ISO 2500 gives a correct exposure, use ISO 2500. There is no prize for forcing ISO 400 and returning home with blurred frames.
Common ISO mistakes to avoid
Keeping ISO low at all costs
This is the classic mistake. Low ISO is desirable only when it does not compromise shutter speed, aperture, or exposure. Clean blur is still blur.
Using high ISO in bright daylight by accident
If you move from indoors to sun and forget ISO 3200, your camera may be forced into an extremely fast shutter speed or a very narrow aperture. Make ISO part of your quick pre-shoot check, especially if you do not use Auto ISO.
Ignoring image stabilization limits
Image stabilization helps reduce camera shake, but it does not freeze a moving person, pet, or vehicle. A stabilized lens may let you handhold a building at 1/10 sec, but a child laughing and turning their head will still blur.
Trying to repair severe underexposure later
Editing software and modern noise-reduction tools are useful, but they cannot restore detail that was never recorded. Get as much exposure as you safely can in camera without clipping important highlights.
Build confidence with a simple ISO exercise
Take your camera outside near sunset and photograph the same scene as the light falls. Start at ISO 100 and use an aperture you like. Increase ISO only when your chosen shutter speed becomes too slow.
Try it with a stationary subject, then with someone walking. Compare the images for sharpness, noise, colour, and overall usefulness. You will quickly find the point where your camera’s higher ISO files are still more than good enough.
The best ISO is not always the lowest one. It is the setting that supports the photograph you are trying to make—sharp where it needs to be, bright enough to edit, and faithful to the moment. Next time the light drops, resist the urge to pack up: raise the ISO, make the frame, and see what your camera can really do.