The Ultimate Guide to Metering Mode
Metering mode sounds technical, but it solves a very practical problem: how your camera decides what “properly exposed” looks like before you take the shot.
Get it right, and a bright sky stays bright without turning your subject into a silhouette. Get it wrong, and a white wedding dress becomes dull grey, or a black dog looks washed out. The good news is that metering is not mysterious once you understand what the camera is measuring—and where it is looking.
This guide covers the main camera metering modes, when to use each one, and how to make quick exposure decisions in real shooting situations.
What is metering mode?
Metering is your camera’s method for measuring the light in a scene. It uses that reading to suggest an exposure: a combination of shutter speed, aperture, and ISO.
Your metering mode tells the camera which parts of the frame should matter most when it calculates that exposure.
There is one important catch: your camera does not know whether it is looking at snow, a black cat, a sunset, or a person in a white shirt. It tries to expose the scene so the area it measures averages out to a medium tone—often described as middle grey.
That is why bright scenes often come out too dark and dark scenes often come out too bright. The meter is doing its job; it just needs a little direction from you.
The main metering modes explained
Names vary slightly between camera brands, but most cameras offer versions of the same core modes.
Evaluative, matrix, or multi-segment metering
This is the default mode on most cameras. Canon commonly calls it Evaluative Metering; Nikon, Sony, Fujifilm, and others often use names such as Matrix, Multi, or Multi-segment.
The camera divides the frame into multiple areas, measures brightness across them, and creates an overall exposure recommendation. Many modern cameras also consider focus point position, subject detection, or scene information.
Use it for:
- Travel photography
- Street photography
- Family events
- Landscapes with fairly balanced light
- Fast-moving situations where you cannot meter every frame manually
For everyday shooting, this is usually the best starting point. It is especially useful when the light is not extreme and your subject fills a reasonable portion of the frame.
Watch out for: a subject strongly backlit by a window or sunset. The camera may prioritize the bright background and leave the person too dark. In that case, use exposure compensation, spot metering, or manual exposure.
Center-weighted average metering
Center-weighted metering measures the whole frame but gives extra importance to the central area.
It is less complicated than evaluative metering and can feel more predictable when your subject is usually near the middle of the frame. It does not care much about a bright edge or corner, which can be useful when photographing a person against a bright but small background area.
Use it for:
- Portraits with the subject near the center
- Documentary photography
- Scenes where the edges are much brighter or darker than your main subject
- Photographers who prefer a consistent, straightforward meter response
Imagine photographing someone at an outdoor café. There is a bright white awning at the edge of the frame, but your subject is in the middle. Center-weighted metering is less likely than an all-frame mode to let that awning dominate the exposure decision.
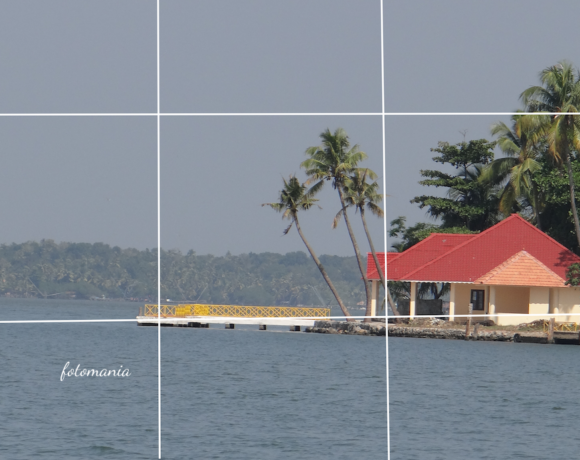
Watch out for: off-center compositions. If you place your subject on the rule-of-thirds line, the meter may be giving priority to the wrong part of the scene.
Spot metering
Spot metering reads light from a very small area of the frame. Depending on the camera, this may be a tiny circle near the center or an area linked to the active autofocus point.
Spot metering gives you precision, but it also asks more of you. If the spot lands on a pale face, a black jacket, or a patch of sunlit grass, the camera will try to make that specific area medium grey unless you compensate.
Use it for:
- A bird against a bright sky
- A performer under a stage spotlight
- A moonlit scene
- A portrait with strong backlight
- High-contrast scenes where the background is irrelevant
Say you are photographing a singer on a dark stage. Evaluative metering may see all that black space and brighten the frame too much, blowing out the singer’s face under the spotlight. Spot meter from the face or a similarly lit area, then adjust as needed to protect the highlights.
Watch out for: tiny changes in framing. Moving the spot from a person’s dark hair to their light skin can produce a noticeably different exposure. Spot metering works best when you deliberately choose the tone you want to measure.
Partial metering
Some cameras offer partial metering, which sits between center-weighted and spot metering. It measures a small central portion of the frame, but a larger area than a true spot meter.
It can be useful for portraits or backlit subjects when spot metering feels overly sensitive. If your camera has it, think of it as a practical middle ground: more selective than evaluative metering, less exacting than spot.
Highlight-weighted metering
A few cameras include highlight-weighted metering. This mode gives special attention to bright areas to reduce the risk of clipped highlights.
It can be helpful for concerts, white clothing in direct sun, reflective products, or any scene where preserving bright detail matters more than lifting shadows.
Expect darker-looking files, especially in contrasty scenes. That is often intentional. You can brighten shadows later when shooting RAW, but detail that is completely blown out is much harder to recover.
Why your meter can still be “wrong”
Your camera meter is not broken when it gets fooled by a very bright or very dark scene. It is simply trying to average what it sees.
Here are two classic examples:
- Snow scene: The meter sees lots of brightness and darkens the exposure, often making white snow look grey. Add positive exposure compensation, perhaps +1 EV as a starting point, then check your result.
- Black dog on dark pavement: The meter tries to brighten the dark scene toward grey, which can make the image look flat or overexposed. Apply negative exposure compensation and protect any important highlights.
The exact adjustment depends on the light, your camera, and the look you want. The point is not to memorize a fixed number. It is to recognize when the meter’s middle-grey assumption does not match the scene.
Metering mode and exposure compensation: the useful pairing
Metering mode chooses where your camera measures. Exposure compensation tells it to make the resulting image brighter or darker than its suggested exposure.
In aperture priority, shutter priority, and program mode, exposure compensation is one of the fastest ways to take control without switching to full manual exposure.
- Choose the metering mode that best suits your subject and scene.
- Take a test shot or check the live view preview.
- Look for important clipped highlights or blocked shadows.
- Use positive compensation to brighten or negative compensation to darken.
- Check the histogram when the scene is high contrast or the light is tricky.
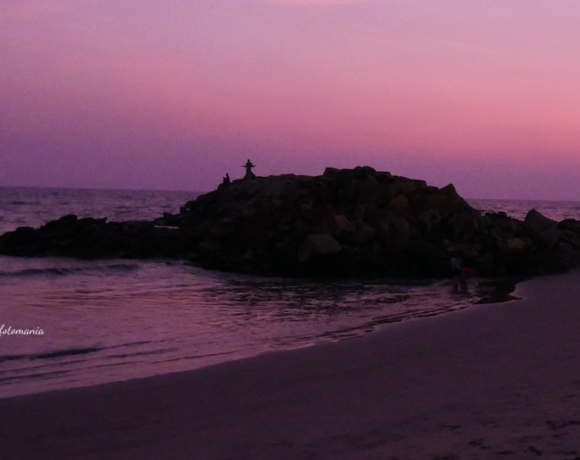
For example, when photographing a person in front of a sunset, evaluative metering may preserve the sky and turn the person into a silhouette. If you want the person properly exposed, add positive compensation, use fill flash, or meter directly from their face. If you want a dramatic silhouette, leave the exposure biased toward the sky.
Neither result is automatically correct. Metering supports your intention; it does not replace it.
How to use spot metering without getting lost
Spot metering becomes much easier when you stop expecting it to make every subject look correct automatically.
Suppose you meter a pale face in open shade. If you let the camera expose that face as middle grey, it may look slightly too dark. You may need to add a little positive exposure compensation. Meter from a black coat, and you will likely need negative compensation to keep it looking black.
A simple approach is to meter from a mid-tone in the same light as your subject. Green grass, weathered wood, grey pavement, or a neutral-coloured bag can work, provided it is not strongly reflective or in different light.
Then lock that exposure and recompose. Most cameras offer an AE-L or exposure-lock button for exactly this purpose.
A practical metering workflow for real shoots
You do not need to change modes for every frame. Start simple and become more selective only when the light demands it.
For travel and street photography
Use evaluative or matrix metering. Keep an eye on exposure compensation when walking from shade into bright sun, or when a person is backlit. If the light is consistent, manual exposure can be even faster because the meter will not shift every time your composition changes.
For portraits
Evaluative metering is often enough in soft, even light. Use center-weighted or partial metering if the background is distracting the meter. For a strongly backlit portrait, meter from the face, add fill light, or deliberately expose for the background if you want a silhouette.
For landscapes
Evaluative metering is a good starting point, but check the histogram carefully around sunrise and sunset. Bright clouds can clip before they look obvious on the rear screen. Highlight-weighted metering, if available, can help preserve sky detail; bracketing is also sensible when the scene exceeds your camera’s dynamic range.
For wildlife and sports
When your subject is small against a bright or dark background, spot or partial metering can be useful. A white bird against dark water and a dark bird against bright sky need very different exposure decisions. Review a few frames early rather than trusting the meter blindly.
Common metering mistakes to avoid
- Changing metering mode when exposure compensation would solve the issue: Evaluative metering plus a quick adjustment is often faster than switching modes.
- Using spot metering for unpredictable action: It is precise, but only if the spot stays on the intended area.
- Judging exposure only from the LCD: Screen brightness can be misleading. Use the histogram and highlight warning tools when available.
- Forgetting that RAW gives you more flexibility, not unlimited rescue room: Protect important highlights at capture whenever possible.
- Assuming one mode is “professional” and another is not: The best mode is the one that gives you a reliable starting exposure for the scene in front of you.
The best metering mode to use most of the time
For most photographers, evaluative or matrix metering is the best all-purpose choice. Modern cameras are very capable at reading ordinary scenes, and it lets you focus on timing, composition, and your subject.
Learn spot metering for difficult light. Keep center-weighted metering in mind when you want a more consistent center-focused response. Most importantly, build the habit of noticing when a scene is unusually bright, unusually dark, or strongly backlit. Those are the moments when metering decisions matter most.
The meter is best treated as a smart assistant, not a final authority. Once you start asking, “What is the camera trying to make grey here?” exposure problems become far easier to predict. Try one metering mode on your next walk, photograph the same scene in different light, and see where your camera’s assumptions match—or miss—your creative intent.