Essential Guide to Real Estate and Architecture Photography
Photographing buildings looks simple until you are standing in a narrow hallway trying to make a small bathroom feel spacious. Real estate and architecture photography share the same subject, but their goals differ. Real estate images need to present a property clearly and attractively, often for a quick viewing decision. Architecture photography focuses more on design, materials, structure and atmosphere. Decide which purpose comes first before you choose your composition, lighting and editing style.
Choose Gear That Solves Problems
You do not need the most expensive camera system, but the right tools can make difficult interiors much easier to photograph.
Camera and Lens
A modern interchangeable-lens camera with good dynamic range is useful for interiors containing both dark corners and bright windows. Full-frame cameras can offer advantages in low light and provide a wide choice of lenses, but crop-sensor cameras can produce excellent results too. Careful lighting, composition and processing usually matter more than sensor size.
The lens has a particularly strong effect on the result. A wide-angle zoom is versatile for real estate work, especially when you need to show how rooms connect. On a full-frame camera, a lens covering roughly 16mm to 35mm is a common choice, although extremely wide settings can make furniture and room proportions look unnatural.
A tilt-shift lens can be valuable for architecture photography. Its movements allow you to frame a tall building while keeping the camera level, which helps preserve straight vertical lines. It is not essential, however. A regular wide-angle lens combined with a stable camera position and careful perspective correction can work well.
Support, Lighting and Accessories
- Tripod: Useful for bracketing, long exposures and consistent compositions. It is not mandatory for every bright, fast-paced property shoot, but it improves control.
- Remote release or self-timer: Helps prevent camera movement during longer exposures.
- Off-camera flash or LED lighting: Gives you more control when interiors are dark or window light is difficult to balance.
- Spirit level or electronic level: Helps prevent distracting tilted horizons and walls.
- Lens cloth, spare batteries and storage cards: Small omissions can interrupt an otherwise well-planned shoot.
- Polarising filter: Sometimes useful outdoors for reducing reflections on glass and controlling glare, although it can make uneven skies more noticeable with a wide lens.
Prepare Before You Arrive
Good preparation saves more time than aggressive editing. Ask the client or occupant to remove unnecessary objects from worktops, tables and floors. Beds should be made, toilet seats lowered, rubbish and recycling hidden, and personal documents kept out of view. Garden furniture, hoses and bins also deserve attention in exterior images.
Confirm who will provide access, whether any rooms are off limits and whether pets or occupants need to be managed. For commercial or architectural projects, clarify whether you have permission to photograph the site and who owns the right to approve publication.
- Review the property beforehand. Look at available listing images, plans or online maps to understand the layout and identify the strongest features.
- Check the direction of light. A map or compass can help you estimate when the front, rear or main living spaces will receive useful light.
- Check the weather. Soft cloud can reduce contrast on an exterior, while direct sun can add texture and strong shadows. Neither is automatically best.
- Make a shot list. Include the front elevation, rear exterior, principal rooms, bedrooms, bathrooms, circulation spaces and distinctive details.
- Allow time for styling. Moving a chair, opening a blind or removing a distracting object can improve an image more than another camera adjustment.
Interior Photography: Light and Composition
Control Mixed Light
Turning on every light is not always the best solution. Daylight, warm household bulbs and cool LEDs can create competing colour casts. Begin by deciding what the image should communicate, then make the light sources work together where possible.
- Ambient light: Photograph using the existing daylight and practical lights. This can look natural, but bright windows may become very light and shadow areas may lose detail.
- Bracketing: Capture several exposures from the same locked-off position and combine them later. This is useful when the room and windows differ greatly in brightness.
- Flash blending: Use controlled flash to lift darker areas, then combine it with an ambient exposure. Flash should reveal the room rather than create obvious hot spots.
- Continuous lighting: LED panels can help with small areas and detail shots, provided their colour and intensity are controlled.
Do not point a small flash directly at a nearby wall or shiny surface unless you want a hard reflection. Bouncing light from a neutral ceiling or wall can soften it, but coloured surfaces may tint the result. For larger interiors, several subtle light sources are often easier to control than one powerful source.
Set the Camera Carefully
A camera height around chest level often gives a balanced view of a room. Lower positions can make floors dominate, while very high positions may make furniture and surfaces look unnaturally compressed. Adjust the height according to the room: a kitchen may benefit from showing more worktop, while a living room may need more emphasis on seating and windows.
Keep the camera as level as possible. If you point it sharply upward, vertical lines converge and walls appear to lean. A tilt-shift lens can reduce this effect while shooting, but software perspective correction is another option. Correcting a small amount is usually safer than relying on heavy adjustments, which can crop the frame and stretch the edges.
Use corners and doorways to show depth, but avoid making every image extremely wide. A room should look spacious without appearing distorted. Include relationships between spaces where they help the viewer understand the layout, and vary the compositions so the final set does not feel repetitive.
Bracketing, HDR and Natural Results
Bracketing means recording the same composition at different exposures. The images can be blended manually or with HDR tools in editing software. It works best when the camera remains completely still and moving objects are limited.
HDR processing is easy to overdo. Excessive shadow lifting, strong clarity and unusual colour can make walls look dirty and furniture look artificial. Aim for detail in the shadows, believable window views and a colour balance that resembles the space in person. If people, curtains or trees move between exposures, check the blend carefully for ghosting.
Exterior and Architectural Photography
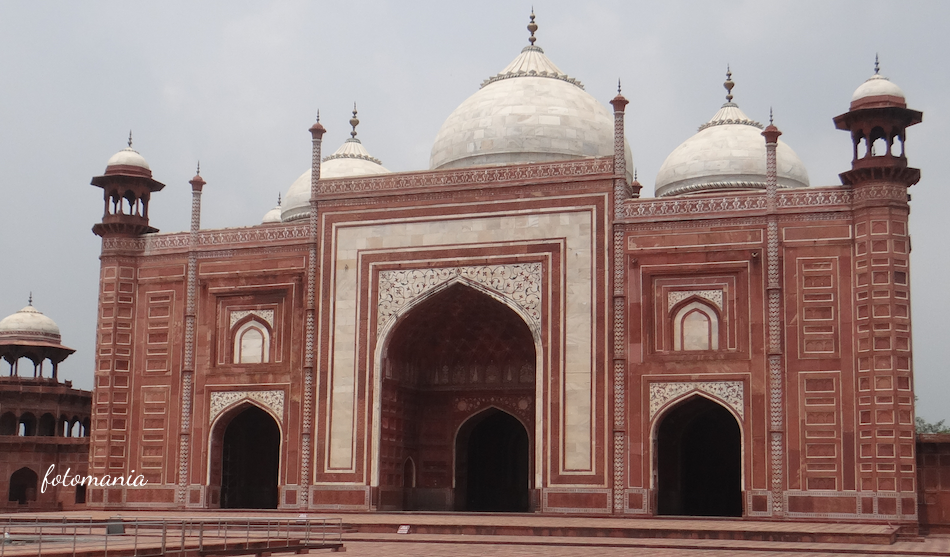
Exterior images benefit from thoughtful timing and a clear relationship between the building and its surroundings. Morning or late-day light can reveal texture and depth, while softer overcast conditions may suit pale facades and reduce distracting contrast. The best time depends on the building orientation, materials and desired mood rather than a fixed clock time.
The period around sunset can be effective for buildings with illuminated interiors. A tripod allows a longer exposure, and waiting until the sky retains some colour can create a useful balance between the facade, windows and background. Check that interior lights are actually on and that blinds or curtains are arranged consistently before making this a key image.
For architecture work, look beyond the standard front elevation. Study repeating windows, junctions between materials, staircases, entrances, rooflines and the way people use the space. Detail images can communicate design decisions that a wide view misses. Include enough context to show the building’s setting, but remove visual distractions when they do not contribute to the story.
Keep people, vehicles and temporary signage in mind. They may add scale and activity, but they can also obscure the design. If identifiable people are included in work intended for publication or commercial promotion, establish whether permissions are required.
Post-Processing Without Misrepresentation
A consistent, restrained edit is usually more valuable than a dramatic one. Common adjustments include:
- Lens correction: Reduce barrel distortion and edge stretching caused by wide lenses.
- Perspective correction: Straighten verticals and horizontals without making the building look unnaturally altered.
- White balance: Neutralise unwanted colour casts while preserving the atmosphere of the space.
- Window detail: Recover highlights or blend exposures so exterior views remain believable.
- Colour and contrast: Create a coherent set of images rather than treating every frame with a different look.
- Object removal: Remove minor distractions where appropriate, but do not erase permanent features or alter the property in a misleading way.
Sky replacement can help an exterior presentation when the original sky is distracting, but it should remain realistic and consistent with the direction of the light. For architecture clients, accurate materials and colours are often more important than a polished effect. Agree on the editing approach before delivery, particularly if the images will be used for planning, documentation or a design portfolio.
Deliver Consistent, Useful Images
Before exporting, inspect every frame at full size. Look for dust spots, cloned patterns, bent lines, visible reflections, accidental personal information and inconsistent colour between rooms. Check that windows, mirrors and polished surfaces do not reveal you, your equipment or unwanted occupants.
Ask the client how the images will be used. Web listings may need resized JPEG files, while architects, designers and publishers may require larger files, specific colour profiles or carefully named folders. Agree on the number of final images, turnaround time, usage rights and whether an archive of the original files is included.
Build a Stronger Portfolio
Real estate clients often want clear, attractive coverage delivered reliably. Architecture clients usually assess your ability to understand design, work on location and produce a coherent visual story. A portfolio should therefore show more than isolated spectacular images. Include complete examples that demonstrate preparation, interiors, exteriors, details and consistent editing.
Organise the work by property type, project or service. A simple, fast-loading website is often more useful than a crowded social feed. Contact local estate agents, architects, interior designers and property managers with a focused selection that matches their work. A small, carefully photographed project can demonstrate more skill than a large gallery of unrelated images.
Final Checklist
Before pressing the shutter, ask whether the camera is level, the room is ready, the light is controlled and the composition explains the space. Before delivering, ask whether the image is accurate, consistent and suitable for its intended use.
Real estate photography presents a property at its most appealing and understandable. Architecture photography examines how a building is designed, made and experienced. The strongest photographers can move between those approaches deliberately, without allowing attractive images to become misleading ones.