Absolute Beginner’s Guide to Macro Photography
There’s a whole world hiding in plain sight — inside a flower, across the back of a beetle, on the surface of a coin. Macro photography reveals that world, and it’s far more accessible than most beginners expect. You don’t need an expensive setup or a studio. What you do need is a basic grasp of three things that behave very differently at close range: depth of field, focus, and light.
What “macro” actually means
Strictly speaking, true macro photography refers to a 1:1 reproduction ratio — the subject is projected onto the sensor at its actual real-world size. A 10mm beetle appears as a 10mm image on the sensor. Some lenses go beyond this; many consumer zoom lenses with a “macro” label don’t reach it.
That distinction matters most when you’re comparing equipment. A compelling close-up made at less than 1:1 can still show extraordinary detail, colour, and structure. For a beginner, learning to manage focus and light is more important than chasing maximum magnification.
Gear: what you actually need
A dedicated macro lens
The cleanest option. Macro lenses are designed to focus at close range while remaining usable at ordinary distances. Common focal lengths run from around 50mm to 200mm, though availability varies by camera system.
The key practical difference between focal lengths is working distance — the gap between the front of the lens and the subject. A 50mm macro puts you very close, which can block light and startle insects. A lens in the 90–105mm range gives you more breathing room, which is useful for living subjects and for positioning a light source without the lens casting a shadow.
Extension tubes
Extension tubes are hollow rings that fit between the camera body and any existing lens, moving the lens farther from the sensor so it can focus much closer. There’s no glass involved, so they don’t degrade image quality. They’re an affordable way to experiment with lenses you already own. The trade-offs are reduced light, loss of the ability to focus at normal distances, and autofocus that can become slow or unreliable.
Close-up filters
These screw onto the front of a lens like a standard filter and act as a magnifying element. Better-quality versions can produce useful results; cheaper ones tend to soften the edges of the frame noticeably. They’re the lowest-cost entry point, but optical quality varies significantly.
A tripod
At macro distances, even slight camera movement produces blur. A tripod is genuinely valuable for static subjects — flowers, objects, textures — especially in lower light. For insects and other moving subjects, many photographers prefer to handhold and use a faster shutter speed instead, since a tripod becomes impractical when the subject won’t stay still.
The biggest challenge: depth of field
This is what surprises beginners most. As you focus closer, the zone of apparent sharpness — the depth of field — shrinks dramatically. At close range, the front of an insect’s eye may be sharp while its body is already soft. When you photograph a watch mechanism, only a few gears will be in focus at once.
Stopping down your aperture helps. Shooting around f/8 to f/11 gives you more depth of field than a wide aperture. Going beyond f/16 introduces diffraction, which can make the entire image look slightly softer — so there’s a practical limit. Rather than automatically choosing the smallest available aperture, decide which part of the subject must be sharp and position the camera to prioritise that.
Camera angle matters more than most beginners realise. If you photograph a butterfly from the side and keep the sensor plane roughly parallel to its wings, more of the insect falls within the narrow focus zone. Shooting diagonally across the same subject may leave only one small area sharp.
Focus stacking
For static subjects, focus stacking is the most powerful solution. You capture multiple frames at slightly different focus distances, then blend them in software — Photoshop, Helicon Focus, and Zerene Stacker are commonly used options. Keep the camera and subject still, use manual exposure, and move the focus point gradually from front to back. The result is a composite with far greater apparent depth of field than any single frame could achieve. It’s more involved, but the results can be striking. Moving insects and wind-blown plants are much harder to stack successfully.
Focusing at macro distances
Autofocus can work well on larger, clearly defined subjects — place a single focus point over an obvious detail like an insect’s eye and it will often lock on cleanly. At high magnification or in low contrast, the lens tends to hunt.
Many experienced macro photographers switch to manual focus and use a different technique: rather than turning the focus ring to adjust sharpness, they set the approximate focus distance on the lens and then rock the camera — or their body — gently forward and backward until the subject snaps into focus. It sounds awkward but becomes intuitive quickly.
When shooting handheld, take several frames as your body naturally shifts through the focus plane. For tripod work, use live view or your viewfinder’s magnification function to check critical focus before you shoot, and use a remote release or short self-timer to avoid shake from pressing the shutter button.
Getting the light right
Macro photography is hungry for light. Stopping down your aperture and working at close distances both reduce the amount reaching the sensor, so you’ll often find yourself managing slow shutter speeds or elevated ISO values.
Soft, diffused light is generally easier to work with than direct sun. Hard light creates distracting reflections on beetle shells, wet leaves, and metal surfaces. Open shade, an overcast sky, or light passed through a diffuser gives smoother transitions between highlights and shadows.
A small piece of white card positioned opposite the main light can bounce fill light onto a shadowed side of your subject at no cost. A black card can do the reverse, adding definition to pale or reflective edges. For flowers and tabletop subjects on a budget, this is often all you need.
Flash provides enough light for a smaller aperture and effectively freezes movement, but diffusion is essential. A bare flash close to the subject produces harsh highlights and deep shadows. A diffuser enlarges and softens the light source. Also check that the lens barrel isn’t blocking the flash when you’re only a few centimetres from the subject — it happens more often than you’d expect.
Composition at close range
Filling the frame is not always the strongest choice. Leave room around a flower to show its shape, or give an insect visual space in the direction it faces. Watch the background before you shoot: a bright twig or stray patch of sky can pull attention away from a delicate subject.
Small camera movements can transform what’s behind the subject. Shift slightly left or lower your angle to place a patch of foliage behind the insect. Because out-of-focus areas become very smooth at close range, a simple background provides clean separation with very little effort.
A practical first-shoot workflow
- Choose a stationary subject in soft light — a leaf, flower, coin, or textured household object.
- Remove distracting elements from the background, or shift your position to clean it up.
- Set aperture priority at f/8 and choose an ISO that keeps your shutter speed practical.
- Use a single autofocus point, or switch to manual focus and use the rocking technique.
- Place focus on the most important detail — usually the eye of an insect, or the sharpest edge of a texture.
- Take several frames, making small adjustments to angle, distance, and exposure between them.
- Review the images zoomed in to check critical sharpness — what looks fine on a small preview often reveals softness at 100%.
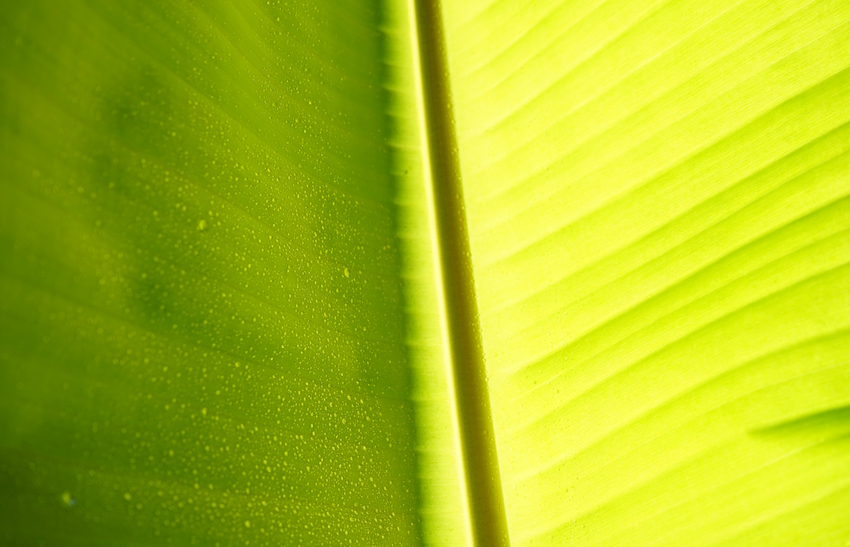
Good subjects for early sessions include flower petals and stamens, leaf veins, fabric weave, circuit boards, shells, and kitchen spices. These let you experiment with focus and light without the pressure of a moving subject. Once you’re comfortable with the technical side, insects are endlessly rewarding — early morning is often the best time, when lower temperatures make them slower and easier to approach.
Your first attempts will include missed focus and unexpected blur. Treat each frame as practical feedback: use a faster shutter speed if the subject moved, improve diffusion if highlights are harsh, adjust your angle if too little is sharp. Those small, deliberate corrections are the fastest route from simple close-ups to convincing macro photographs.
Do I need a dedicated macro lens to start?
No. A set of extension tubes fitted to a 50mm or 85mm prime lens is a cost-effective way to begin. You’ll give up the ability to focus at normal distances while the tubes are attached, and autofocus may be slower, but image quality can be very good. Close-up filters are another option, though quality varies — spend a little more if you go that route.
Why does my macro shot look sharp on the camera screen but soft when I zoom in?
The camera’s rear screen and default playback view are too small to reveal focus problems. Always review macro images at full magnification — 100% on screen — before you move on. A frame that looks fine in the thumbnail often shows missed focus, motion blur, or diffraction softness when you zoom in.
What’s the best aperture for macro photography?
There’s no single answer, but f/8 is a reasonable starting point for most situations. It gives you more depth of field than a wide aperture without the diffraction softening that can appear at very small apertures like f/22. Adjust from there based on how much of the subject you need to be sharp and how much light you have available.