How to Safely Clean Your Camera Sensor and Lenses at Home
Dust on a camera sensor can turn a clean blue sky into a pattern of dark spots, while fingerprints and smears on a lens can reduce contrast and create unwanted flare. The good news is that most routine camera cleaning can be done safely at home—provided you use the right tools, work slowly, and avoid touching delicate surfaces unnecessarily.
Sensor cleaning deserves particular care because the sensor sits inside the camera body and is far more vulnerable than the front element of a lens. Lens cleaning is usually straightforward; sensor cleaning requires a controlled technique and equipment designed specifically for the job. If the dirt is stubborn, the camera has been exposed to moisture, or you are uncertain about a step, professional service is the safer choice.
First, identify what needs cleaning
Not every mark in a photograph comes from the sensor. A dirty lens front element can cause haze, flare, or reduced contrast, but sensor dust usually appears as small, soft-edged dark spots that stay in the same position in the frame.
To check for sensor dust, photograph a plain, bright surface such as a clear sky or a sheet of white paper. Use a narrow aperture—around f/16 or f/22—and focus on infinity or deliberately defocus slightly. Keep the camera still and compare the image at high magnification. Sensor dust tends to remain fixed relative to the image, even when the composition changes.
A test image is useful before and after cleaning. It helps you avoid cleaning a sensor that is already clear and shows whether a particular mark has disappeared.
Prepare a clean, controlled workspace
Choose a well-lit indoor area away from open windows, fans, cooking areas, and dusty fabrics. A table with a clean surface is better than trying to clean the camera while holding it in one hand. Wash and dry your hands first, and remove camera straps or accessories that may get in the way.
Gather the tools before opening the camera:
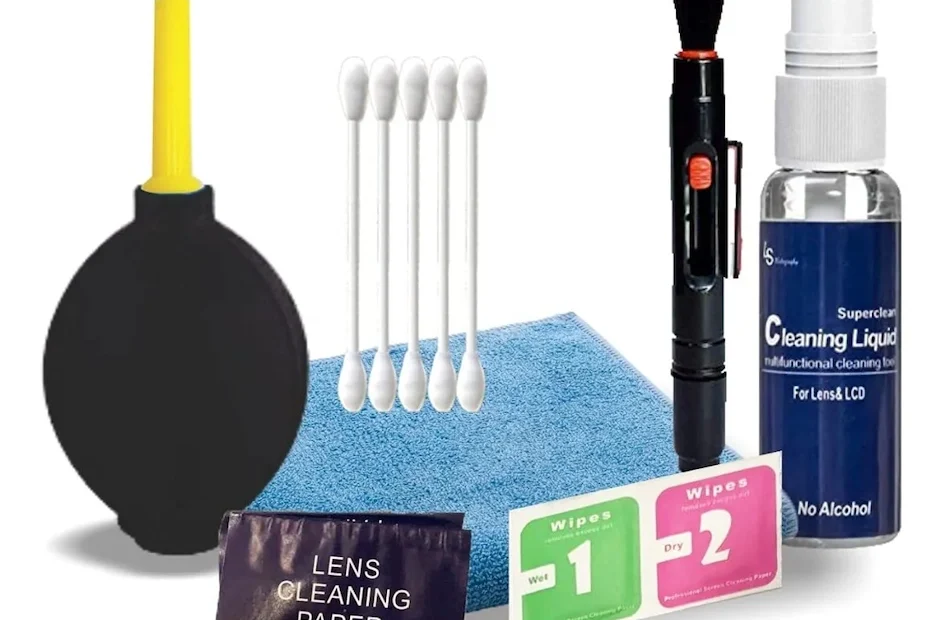
- A manual air blower with a rubber bulb and a clean, one-way valve
- A purpose-made sensor brush, if you intend to use one
- Sensor swabs designed for your camera’s sensor size
- Sensor-cleaning fluid made for photographic sensors
- A lens blower and a soft lens brush
- Microfiber lens cloths or disposable lens tissues
- Lens-cleaning solution intended for coated optical surfaces
Keep sensor tools separate from lens-cleaning tools. A cloth that has picked up grit, grease, or cleaning fluid from a lens should never be used inside the camera body.
How to safely clean a camera sensor
1. Charge the battery and select the correct cleaning mode
Before opening the sensor area, make sure the battery is well charged. Many cameras use a menu command such as “cleaning mode” or “lock mirror up for cleaning” to hold the mirror and shutter out of the way. The exact procedure varies, so check the camera manual rather than relying on a generic button combination.
Some cameras offer an automatic sensor-cleaning cycle that vibrates the sensor to dislodge loose dust. It can be useful for light contamination, but it will not remove every mark, particularly oil spots or adhered particles.
Never begin a manual clean if the camera may shut down during the process. On a DSLR, an interrupted mirror-up cleaning operation can create a serious problem. Keep the camera facing downward while the sensor is exposed, which helps loose particles fall away rather than settle deeper into the body.
2. Start with air only
Remove the lens and use a manual blower with the camera mount facing downward. Give the blower a few test squeezes away from the camera first. This prevents any dust or residue inside the blower from being directed toward the sensor.
Hold the blower close enough to move air across the sensor area, but do not touch the sensor, shutter curtains, mirror, or mount. Use several gentle puffs rather than forceful blasts. A blower is intended to dislodge loose particles, not scrape them from the surface.
Never use canned or compressed air on a sensor. It can propel particles at damaging speed and may release liquid propellant or other residue.
After blowing, replace the lens or close the body cap and take another test image. If the spots have gone, stop there. Cleaning is safest when you do only what is necessary.
3. Use a sensor brush only when appropriate
A sensor brush can remove dry dust that does not respond to air, but it must be a brush specifically made for sensor cleaning. Ordinary paintbrushes, makeup brushes, and household dusters may carry oils, static, or abrasive particles.
Follow the brush manufacturer’s preparation instructions. Usually, the brush is charged or cleaned as directed, then drawn lightly across the sensor in a controlled motion. Do not press down, scrub, or repeatedly pass over the same area. Avoid the shutter curtains and the edges of the sensor assembly.
If the contamination looks wet, smeared, or oily, a brush is unlikely to solve it. Move to a purpose-made wet-cleaning system or arrange professional cleaning.
4. Wet-clean only with compatible supplies
Wet cleaning uses a single-use swab and a small amount of sensor-cleaning fluid. The swab must match the sensor format—such as full-frame, APS-C, or Micro Four Thirds—and should be packaged for sensor use. A swab that is too large, too small, or reused can leave streaks or move contamination around.
- Read the instructions supplied with the swabs and fluid.
- Place the camera in its cleaning mode with the mount facing downward.
- Apply only the recommended amount of fluid to a fresh swab.
- Make one slow, even pass across the sensor in the specified direction.
- Use the clean side or a new swab for the return pass, if the instructions call for one.
- Inspect the result with a test photograph and allow any remaining fluid to evaporate as directed.
Do not drip fluid directly onto the sensor, use household alcohol or glass cleaner, or continue rubbing because a mark is difficult to remove. If streaks remain after the recommended procedure, stop rather than increasing pressure or adding more liquid. The camera manufacturer or an experienced service technician can deal with contamination that will not lift safely at home.
How to clean camera lenses without damaging coatings
1. Remove loose grit first
Before wiping a lens, use a blower to remove sand, dust, and other particles. Wiping immediately can drag grit across the coating and create fine scratches. A soft lens brush can help with particles around the filter thread, barrel, and edges, but do not force debris toward the glass.
2. Clean the front and rear elements carefully
Put a small amount of lens-cleaning solution on a lens tissue or microfiber cloth—not directly on the glass. Using a gentle circular motion or the method recommended by the lens manufacturer, work from the center toward the edge. Use a dry section of the cloth or a fresh tissue to remove remaining streaks.
The rear element deserves the same care as the front element. It is less exposed during normal use, but any dust or fingerprint there is close to the imaging plane and can affect images more noticeably. Keep the rear cap on whenever the lens is not mounted.
Do not use a shirt, paper towel, facial tissue, or household cleaning product. These may leave lint, contain abrasive fibers, or damage optical coatings. If you use a microfiber cloth, wash it separately from household laundry and retire it when it becomes visibly dirty.
3. Do not forget the other surfaces
Clean the lens hood, filter, cap, and exterior barrel as well as the glass. A dirty protective filter can be mistaken for a dirty lens, and fingerprints on the filter may produce flare when shooting toward a bright window or low sun.
Inspect the lens under angled light rather than chasing every tiny speck. A few particles inside a lens are generally not a reason to dismantle it. Internal cleaning should be handled by a qualified repair service, especially if there is fungus, condensation, or evidence of liquid entry.
When to stop and seek professional help
Professional cleaning is the sensible option if the sensor has been touched accidentally, the shutter curtains have been damaged, liquid has entered the camera, or contamination remains after a careful attempt with appropriate tools. It is also worth considering after shooting in blowing sand, sea spray, smoke, or very humid conditions.
Prevention reduces how often cleaning is needed. Change lenses with the camera mount pointed downward, keep the body cap and rear lens caps clean, avoid unnecessary lens changes in dusty environments, and store equipment in a dry, clean bag. A blower used occasionally on the exterior and lens mounts can remove loose grit before it travels inside the camera.
Clean only when your photographs show a problem, not simply because the camera has been used. A calm inspection, gentle air cleaning, and the correct sensor supplies will handle many routine marks while keeping your camera and lenses safer for the next shoot.