The Ultimate Guide to Exposure Modes
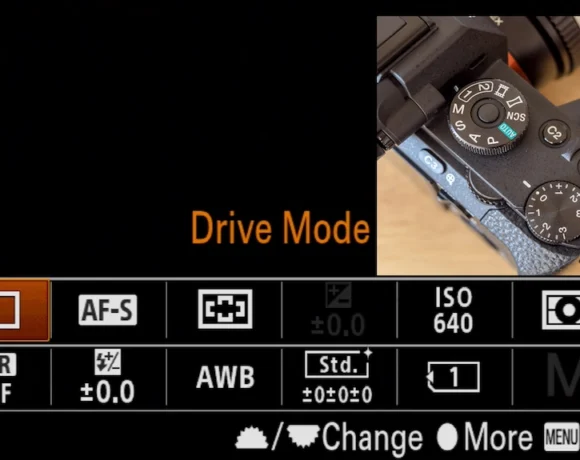
Camera exposure modes can look like a tiny alphabet soup on the mode dial: P, A or Av, S or Tv, M, and sometimes a scattering of scene icons. They all control the same basic thing—how bright or dark your photo is—but they give you different amounts of control over the settings that create that exposure.
Once you understand what each mode actually does, you can stop treating the dial as a mystery wheel. More importantly, you can choose a mode based on the picture you want to make: a soft-background portrait, a sharp landscape, a frozen football kick, or a silky long exposure of water.
Let’s make sense of the options and build a practical way to use them.
Start with the exposure triangle
Every exposure mode works with three settings:
- Aperture: the opening in the lens. It affects brightness and depth of field.
- Shutter speed: how long the sensor receives light. It affects brightness and motion blur.
- ISO: the sensor’s sensitivity setting. It affects brightness and, at higher settings, image noise.
These three settings are often called the exposure triangle. If you change one, you usually need to adjust one or both of the others to keep the image similarly bright.
For example, opening a lens from f/5.6 to f/2.8 lets in four times as much light. To maintain the same exposure, you could use a shutter speed four times faster, such as moving from 1/125 second to 1/500 second.
Exposure modes decide which part of that triangle you control and which part the camera handles for you.
Auto mode: useful, but limited
In Auto mode, the camera selects aperture, shutter speed, and ISO. On many cameras, it may also raise the flash, choose autofocus behavior, and apply other settings automatically.
Auto is not a failure mode. It is perfectly reasonable when you need a quick record of a moment and have no time to think. Hand your camera to a stranger for a group photo, for example, and Auto can be the least stressful option.
The limitation is that the camera has no idea what matters creatively. It does not know whether you want a blurred background, a sharp mountain range, or motion streaks from passing traffic. It only tries to create a technically usable exposure.
If your camera has Auto+, Intelligent Auto, or a similar setting, it may recognize scenes and make more decisions. That can help in casual shooting, but it still leaves you with little say over the look of the image.
Program mode (P): automatic exposure with an escape hatch
Program mode, shown as P, sets aperture and shutter speed for you. Unlike full Auto, though, it usually gives you access to more controls, including exposure compensation, ISO, white balance, drive mode, and flash settings.
Many cameras also offer program shift. Turn a command dial and the camera cycles through equivalent aperture-and-shutter combinations while keeping the overall exposure similar.
Say the camera chooses f/8 at 1/60 second. You might turn the dial to get f/4 at 1/250 second instead. The brightness remains close, but the image changes: f/4 gives you a blurrier background, while 1/250 second is better for a moving subject.
When Program mode makes sense
- Travel photography when light changes constantly.
- Street photography when you need to react quickly.
- Family events where getting the moment matters more than setting every value.
- Learning how your camera meters different scenes.
Program mode is a good bridge between Auto and the semi-manual modes. It keeps you moving while encouraging you to pay attention to the settings the camera prefers.
Aperture Priority (A or Av): control depth of field
Aperture Priority is marked A on many cameras and Av on Canon cameras. You choose the aperture, and the camera selects a shutter speed to match.
This is one of the most useful everyday exposure modes because aperture has such a visible creative effect.
A wide aperture such as f/1.8, f/2, or f/2.8 creates shallow depth of field. It can isolate a person from a busy background, make food photographs feel softer, or help in dim light.
A smaller aperture such as f/8, f/11, or f/16 increases depth of field. It is often useful for landscapes, architecture, groups, and scenes where foreground and background detail both matter.
A practical portrait example
Imagine you are photographing a friend at an outdoor café. Set Aperture Priority to f/2.8 or f/3.5, focus on the nearest eye, and watch the shutter speed. If it stays at 1/250 second or faster, you are in good shape for a fairly still subject.
If the shutter speed drops to 1/30 second, the photo may blur from hand movement or your subject shifting. You can raise ISO, open the aperture further, or move into brighter light.
When to use Aperture Priority
- Portraits and pet photos with soft backgrounds.
- Landscapes where depth of field is the priority.
- Travel images with a clear subject-to-background relationship.
- Close-up photography, where depth of field becomes especially thin.
Shutter Priority (S or Tv): control motion
Shutter Priority is marked S on many cameras and Tv on Canon models. You choose the shutter speed, and the camera chooses an aperture.
This is the mode to reach for when motion is the central problem—or the central creative idea.
Fast shutter speeds freeze action. As a starting point, try:
- 1/500 second for active children, casual sports, and running dogs.
- 1/1000 second or faster for faster sports, birds, and splashing water.
- 1/2000 second or faster for birds in flight or very rapid action.
Slow shutter speeds show movement. Try 1/30 second for a hint of motion in people walking, 1/10 second for intentional camera movement, or several seconds for light trails and smooth water—usually with a tripod.
The catch: your lens has limits
In low light, the camera may not be able to open the aperture wide enough to support your chosen shutter speed. Your viewfinder or screen may show a blinking aperture value, an exposure warning, or a very dark exposure indicator.
If that happens, raise ISO, use a wider-aperture lens, add light, or accept a slower shutter speed. Shutter Priority cannot create light that is not there.
Manual mode (M): complete control, deliberate results
In Manual mode, you select aperture and shutter speed yourself. Depending on your camera setup, ISO may be manual too, or you can use Auto ISO while retaining control of aperture and shutter speed.
Manual is often misunderstood as the “professional” mode you should use all the time. It is simply the best choice when you want the exposure to remain consistent despite changing backgrounds or when the camera meter is easily fooled.
Situations where Manual mode shines
- Studio portraits with fixed flash or continuous lights.
- Night photography on a tripod.
- Panoramas, where matching exposures makes stitching easier.
- Backlit scenes where the camera keeps changing exposure as you reframe.
- Sports or events under consistent lighting, such as an indoor court or stage.
For example, at a school play, the performers may move against a dark curtain and then a bright spotlight. An automatic mode can change exposure every time the composition shifts. In Manual, take a meter reading from a properly lit face, set your exposure, and keep it steady until the stage lighting changes.
Use the meter, histogram, and preview
Manual does not mean guessing. Your camera’s exposure meter shows whether its meter thinks your settings are underexposed or overexposed. That is a useful starting point, not an absolute rule.
For more reliable feedback, review the histogram. If highlights are piling up hard against the right edge, important bright areas may be clipped. If the graph is crammed against the left edge, shadows may be losing detail. Some cameras also offer highlight warnings, often called “blinkies.”
For a bright white subject, such as snow or a bride’s dress, the meter may suggest an exposure that turns white into dull gray. You may need to expose brighter while protecting important highlight detail.
Bulb mode and long exposures
Bulb mode keeps the shutter open for as long as you hold the shutter button, or until you press it again when using a remote release or certain camera settings. It is designed for exposures longer than the camera’s normal timed limit, often 30 seconds.
Use Bulb mode for star trails, fireworks, long light trails, and very dark landscapes. A sturdy tripod, remote release or self-timer, and a stable surface are essential. Even a small bump can ruin a multi-second exposure.
Start with a test shot. Check focus before it gets fully dark, then inspect the histogram and highlights after each exposure. Long-exposure photography is usually a process of small corrections, not a one-shot miracle.
Scene modes: convenient shortcuts
Many entry-level cameras include scene modes such as Portrait, Landscape, Sports, Night Portrait, Food, or Sunset. These are preset packages that favor certain settings.
Sports mode tends to choose faster shutter speeds. Portrait mode often favors wider apertures. Landscape mode may select smaller apertures and richer color processing.
They can be useful if you are just starting out, but Aperture Priority and Shutter Priority give you more predictable control once you understand the basics. Think of scene modes as training wheels, not rules.
Exposure compensation: the control you should know
Exposure compensation lets you tell the camera to make its automatic exposure brighter or darker. It works in Program, Aperture Priority, and Shutter Priority modes, and often in Manual mode when Auto ISO is active.
You will see it displayed as values such as +1 EV or -0.7 EV. One full stop, or +1 EV, doubles the light reaching the sensor compared with the metered exposure.
- Use positive compensation for snow, bright sand, white walls, or a backlit face that looks too dark.
- Use negative compensation for a dark subject against a dark background, a bright stage light, or scenes where highlights are blowing out.
Take a photo, check it, and adjust. A small change of +0.3 or -0.7 EV is often all you need.
A simple mode-selection workflow
When you lift the camera, ask one question: What must I control in this photograph?
- If nothing specific matters and speed is essential, use Program or Auto.
- If background blur or overall depth of field matters, use Aperture Priority.
- If freezing or blurring movement matters, use Shutter Priority.
- If lighting is fixed, tricky, or needs to stay identical from frame to frame, use Manual.
- Use exposure compensation whenever the camera’s result is consistently too bright or too dark.
If you are unsure, Aperture Priority with Auto ISO is a strong default for many photographers. Choose an aperture for the look you want, set a sensible minimum shutter speed if your camera allows it, and keep an eye on the results.
Common exposure mode mistakes
- Using f/1.8 for every portrait: It looks lovely, but depth of field can be so thin that one eye is sharp and the other is not. Stop down to f/2.8 or f/4 for more breathing room.
- Ignoring shutter speed in Aperture Priority: A perfect aperture does not save a blurred image.
- Forgetting exposure compensation: Your camera meter aims for middle gray, not necessarily for the scene you see.
- Staying in Manual when light changes quickly: Manual is powerful, but Aperture or Shutter Priority can be the smarter tool during a fast-moving shoot.
- Keeping ISO unnecessarily low: A slightly noisy sharp image is usually better than a clean but blurry one.
The best exposure mode is not a badge of skill. It is the setting that lets you pay attention to your subject while still making the creative choice that matters most. Next time you shoot, pick one mode on purpose, make ten photos with it, and notice what the camera does in response. What would you like to control more confidently on your next photo walk?