Basic mirrorless Camera Settings for Shooting Video
Mirrorless cameras can produce excellent video, but the default photo settings are not always the best choice once you press record. Video rewards consistency: steady exposure, stable colour, intentional motion blur and reliable focus. A few basic mirrorless camera settings will make a far bigger difference than buying extra gear.
This guide explains what to set before filming, why each choice matters and how to handle the common problems that appear when lighting or movement changes.
Start With a Video Shooting Mode
Switch the camera to its dedicated movie mode if it has one. This usually unlocks video-specific controls for frame rate, recording quality, autofocus, audio and image profiles.
For exposure, manual mode is the most dependable starting point. You choose shutter speed, aperture and ISO, then keep them steady throughout the shot. This prevents the camera from unexpectedly brightening or darkening the footage when a person moves through the frame or the background changes.
Aperture priority can be useful when you are learning or filming in rapidly changing light. It lets you choose the aperture while the camera adjusts exposure. The downside is that the camera may change shutter speed, which changes how movement looks in the clip. If you use aperture priority, watch the shutter speed carefully and use exposure compensation when needed.
Full auto can be convenient for quick family clips, but it is less predictable for work you plan to edit. Auto exposure, auto ISO and auto white balance can all shift visibly during a take.
Choose Resolution and Frame Rate First
Set resolution and frame rate before adjusting shutter speed. These two options determine how much detail the camera records, how motion appears and how much flexibility you have in editing.
Resolution
- 4K records more detail and can give you room to crop, reframe or stabilize footage during editing. It also creates larger files and may require more processing power from your computer.
- 1080p is easier to store, edit and upload. It remains a practical choice for many online videos, especially when speed matters more than heavy cropping.
Use the highest quality setting that your camera, memory cards and editing workflow can handle comfortably. A smooth 1080p workflow is more useful than 4K footage that overheats the camera, fills cards too quickly or becomes difficult to edit.
Frame rate
- 24 frames per second is often used for narrative work, interviews and videos with a more traditional cinematic motion feel.
- 25 frames per second is common in regions using 50 Hz electrical power and can help reduce flicker from indoor lights in those areas.
- 30 frames per second is a practical option for general online video, talking-head content and everyday footage.
- 50 or 60 frames per second records smoother motion and gives you the option to slow footage down when editing in a lower-frame-rate timeline.
Try not to mix frame rates without a reason. A project can include both normal-speed footage and slow-motion footage, but it is easier to edit when you decide on a main delivery frame rate before shooting.
Check recording format and memory cards
Your camera may offer several recording formats, bit rates and compression options. Higher-quality settings preserve more image information, but they require faster cards and create larger files. Check the camera manual for supported card types and speed classes, especially before recording high-resolution or high-frame-rate video.
Before an important shoot, format a compatible memory card in the camera after backing up anything you need. Check the remaining recording time, carry a spare card and make a short test recording. This can reveal card errors or recording limits before the real take begins.
Set Shutter Speed for Natural Motion
In video, shutter speed affects motion blur. It is not simply a way to make the image brighter or darker, as it often is in still photography.
A useful starting guideline is to set shutter speed at roughly double the frame rate. This is commonly called the 180-degree shutter guideline.
- At 24 frames per second, use approximately 1/50 second.
- At 25 frames per second, use approximately 1/50 second.
- At 30 frames per second, use approximately 1/60 second.
- At 50 frames per second, use approximately 1/100 second.
- At 60 frames per second, use approximately 1/125 second.
These settings usually create motion blur that looks natural in normal playback. A much faster shutter speed makes each frame sharper, but moving subjects can look choppy or staccato. That may suit sports, action or a deliberate stylistic choice, but it is usually not the default look people expect from video.
The term soap opera effect is often used loosely, but it is more commonly associated with high frame rates or motion smoothing on televisions than with fast shutter speed alone. Fast shutter speed mainly creates crisp, reduced-blur motion.
Use ND filters outdoors
Bright daylight is where many beginners abandon a suitable shutter speed. If you are filming at 1/50 second and the image is overexposed, it is tempting to raise shutter speed dramatically. That solves brightness but changes the look of motion.
A neutral density filter, usually shortened to ND filter, is the better solution. It reduces the amount of light entering the lens without intentionally changing colour. This lets you keep your chosen shutter speed and aperture in bright conditions.
A fixed ND filter has one strength. A variable ND filter can be adjusted, making it convenient for changing outdoor light. Test variable filters before relying on them for important work, as inexpensive options may produce uneven darkening or colour shifts at stronger settings.
Control Aperture and Depth of Field
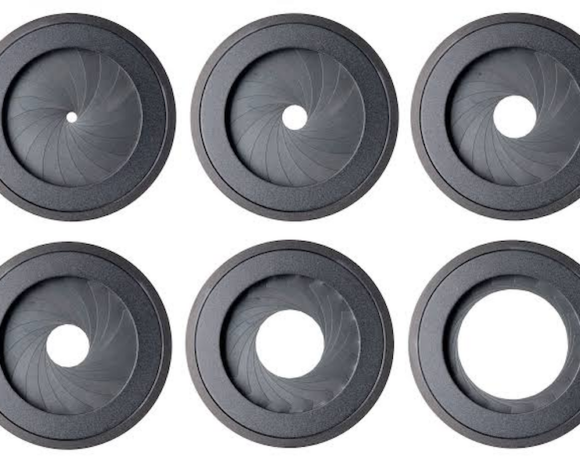
Aperture controls exposure and depth of field. A wider aperture, such as f/1.8 or f/2.8, lets in more light and can blur the background. This is useful for interviews, close-ups and product shots where you want the subject to stand apart from its surroundings.
The tradeoff is a narrower area of acceptable focus. At wide apertures, a small movement toward or away from the camera can make a face or product detail soft. This becomes even more noticeable with longer focal lengths and when filming close to the subject.
For moving subjects, group shots or handheld filming, an aperture around f/4 to f/5.6 can be easier to manage. It gives you more depth of field while still allowing a pleasing separation between subject and background.
Do not choose aperture only for background blur. Choose it for the shot you need to keep in focus. If an interview subject shifts in their chair or turns slightly, reliable focus is more valuable than an extremely blurred background.
Set ISO Deliberately
ISO brightens the image electronically, but increasing it can introduce noise and reduce detail. Video noise is especially distracting because it moves from frame to frame, particularly in shadows and flat areas of colour.
For consistent results, set ISO manually whenever possible. Keep it as low as practical after setting your desired frame rate, shutter speed and aperture. If the image is too dark, consider these options before raising ISO aggressively:
- Move the subject closer to a window or existing light source.
- Add a soft LED light or practical lamp.
- Open the aperture if the depth of field still works for the shot.
- Use a faster lens if you have one.
- Change the location or angle to use available light more effectively.
Every camera handles high ISO differently. Test your own camera in low light and review the footage on a larger screen. Camera menus and specifications may identify a base ISO or recommended range, but real-world testing is the best way to learn what level of noise is acceptable for your work.
Lock White Balance for Consistent Colour
Auto white balance can be useful for casual clips, but it can drift during a recording. A scene may shift warmer or cooler when the camera sees a new colour, a person moves into frame or lighting changes.
For planned video, use a white balance preset or set a custom white balance. Daylight, cloudy, shade and tungsten presets can be good starting points. A custom setting based on a neutral target is especially helpful under unusual lighting.
Be careful in locations with mixed light. A room lit by window daylight and warm household bulbs can produce different colours across the same scene. Whenever possible, turn off unwanted lights, block competing daylight or match your added lights to the dominant source.
White balance is easier to correct than severely incorrect exposure, but getting it close in camera saves time and helps clips match one another during editing.
Use a Sensible Picture Profile
Most mirrorless cameras offer standard colour profiles along with flatter or log-style profiles. Standard profiles add contrast and colour in camera, producing footage that usually looks ready to share with only small edits.
Flat and log profiles are designed to retain more flexibility for colour correction and grading. They can be valuable when you understand exposure, your camera records enough colour information for the profile and you plan to grade the footage properly.
For beginners, a standard profile is often the better choice. Log footage can look washed out before editing, and underexposed log footage can be difficult to recover cleanly. Learn to expose consistently and set white balance first. Then experiment with flatter profiles on test shoots rather than using them for an important one-time event.
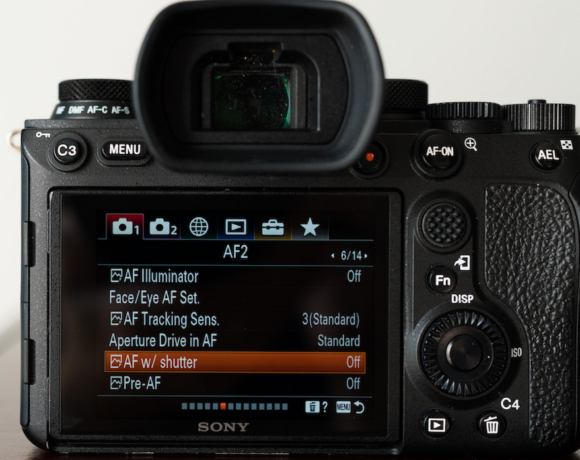
Set Up Autofocus or Manual Focus
Modern mirrorless autofocus can be very effective, but it still needs the right mode for the scene.
- Continuous autofocus is useful for vlogging, handheld shooting, children, pets and any subject that moves toward or away from the camera.
- Face and eye detection can help keep a person sharp when filming interviews or direct-to-camera content. Check that the camera has selected the correct person before recording.
- Touch tracking lets you identify the subject on the screen and can be useful when the subject is not a face.
- Manual focus is often best for locked-off interviews, product shots, landscapes and controlled scenes where nothing needs to refocus during the take.
Use focus peaking and magnification if your camera provides them. Focus peaking highlights high-contrast edges that appear in focus, while magnification lets you inspect a small part of the frame before recording.
Autofocus can struggle in dark scenes, low-contrast backgrounds or busy foregrounds. It may hunt back and forth instead of settling on the subject. If that happens, improve the lighting, simplify the composition, choose a clearer autofocus area or switch to manual focus.
Stabilization and Camera Movement
Many mirrorless cameras offer in-body image stabilization, lens stabilization or electronic stabilization. These tools can make handheld footage easier to watch, but they do not replace good shooting technique.
For handheld shots, hold the camera close to your body, keep your elbows supported and move slowly. When possible, use a tripod, monopod, shoulder rig or gimbal. A stable frame usually looks more intentional than constant movement.
Electronic stabilization may crop into the image. Check the final framing after turning it on, especially when using a wide lens or composing close to the edge of the frame.
Also avoid very fast pans. Many mirrorless cameras use rolling shutter readout, which can make vertical lines lean or wobble during rapid movement. Slower pans, steadier handling and wider focal lengths can reduce the problem.
Watch for Flicker Under Artificial Light
Indoor lighting can create flicker or rolling bands in video, even when the room looks normal to your eyes. This is common with some LED lights, fluorescent fixtures, dimmers and screens.
Match shutter speed to the local electrical frequency when possible. In areas using 50 Hz power, 1/50 or 1/100 second often works well. In areas using 60 Hz power, 1/60 or 1/125 second may be better. Your camera may also include an anti-flicker or variable shutter option.
Always record a short test clip under unfamiliar lights and review it before filming the full scene. If bands appear, change shutter speed in small steps or replace, dim or turn off the problematic light.
Do Not Treat Audio as an Afterthought
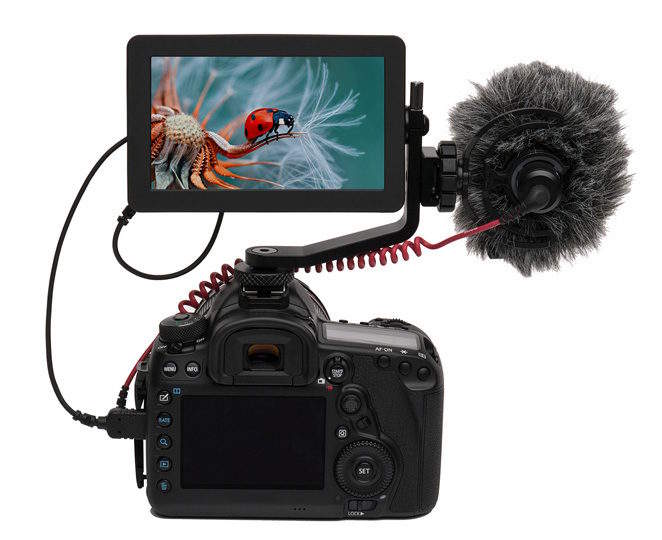
Good visuals cannot rescue unusable audio. The built-in microphone can capture reference sound, but it also picks up camera handling, room echo, wind and background noise. An external microphone placed closer to the speaker is usually a worthwhile upgrade for interviews, tutorials and vlogs.
Set audio levels manually if your camera allows it. Ask the speaker to talk at their natural loudest expected volume and watch the meter. Keep peaks below the top of the meter so loud words do not distort.
- Use headphones to monitor audio when possible.
- Turn on a low-cut filter outdoors if wind or traffic creates low rumble.
- Use a windscreen outdoors, even in a light breeze.
- Record a brief test and listen back before a long interview or event.
- Listen for air conditioning, refrigerators, traffic, buzzing lights and echo.
If your camera offers a safety track that records a second channel at a lower level, it can provide backup if the main channel clips. Check your manual to see whether this feature is available and how it works.
A Simple Mirrorless Video Settings Checklist
- Switch to movie mode and choose manual exposure where possible.
- Select your resolution and frame rate based on the final video and any slow-motion needs.
- Set shutter speed to approximately double the frame rate.
- Choose aperture based on the depth of field and focus reliability you need.
- Set ISO manually and add light before pushing ISO unnecessarily high.
- Set and lock white balance.
- Choose a standard picture profile unless you are ready to grade log or flat footage.
- Select continuous autofocus, subject tracking or manual focus for the specific shot.
- Turn on stabilization if it helps, then check for cropping or unwanted movement.
- Check audio levels, microphone connection, battery life and remaining card space.
- Record a short test clip and review focus, exposure, colour, flicker and sound.
The goal is not to memorize a single perfect camera setup. Good video settings depend on the light, the subject, the intended frame rate and how the footage will be edited. But when you set the essentials deliberately, your mirrorless camera stops making important creative choices for you.
Start with a locked shutter speed, manual white balance, a suitable autofocus mode and clean audio. Those basics will make your footage look more consistent long before you need advanced accessories or complicated colour grading.